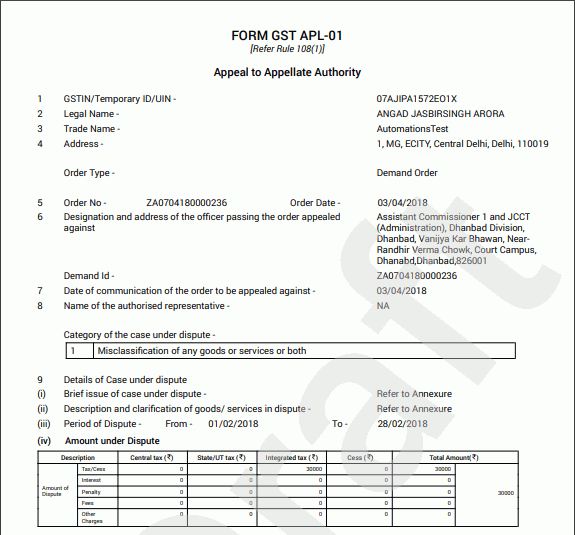
Filing an Appeal against Demand Order (FORM GST APL-01)
How do I file an appeal against a Demand Order?
To file an appeal against a demand order, perform following steps:
-
Access the www.gst.gov.in URL. The GST Home page is displayed.
-
Login to the GST Portal with valid credentials i.e. your User Id and Password.
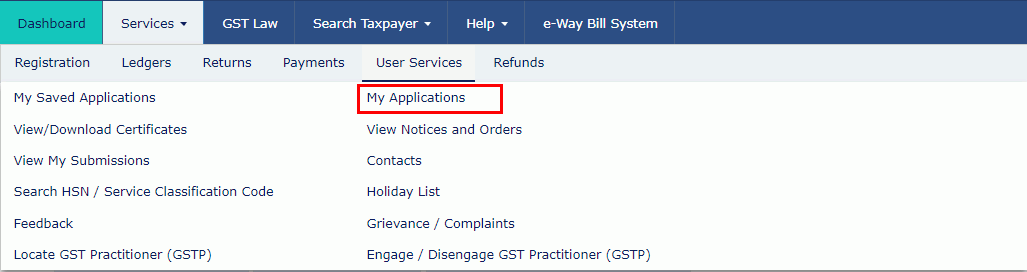
A. Creating Appeal to Appellate Authority
- Click the Services > User Services > My Applications command.
-
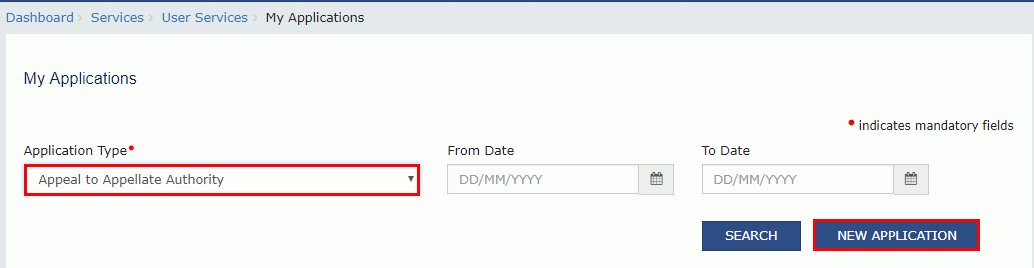
The My Applications page is displayed. Select the Application Type as Appeal to Appellate Authority from the drop-down list.
-
Click the NEW APPLICATION button.
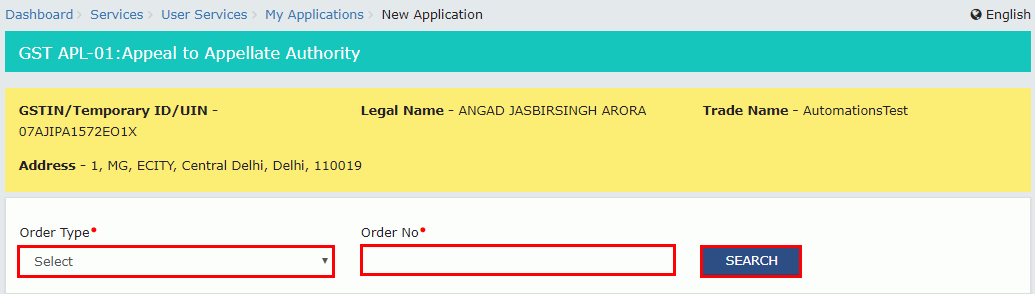
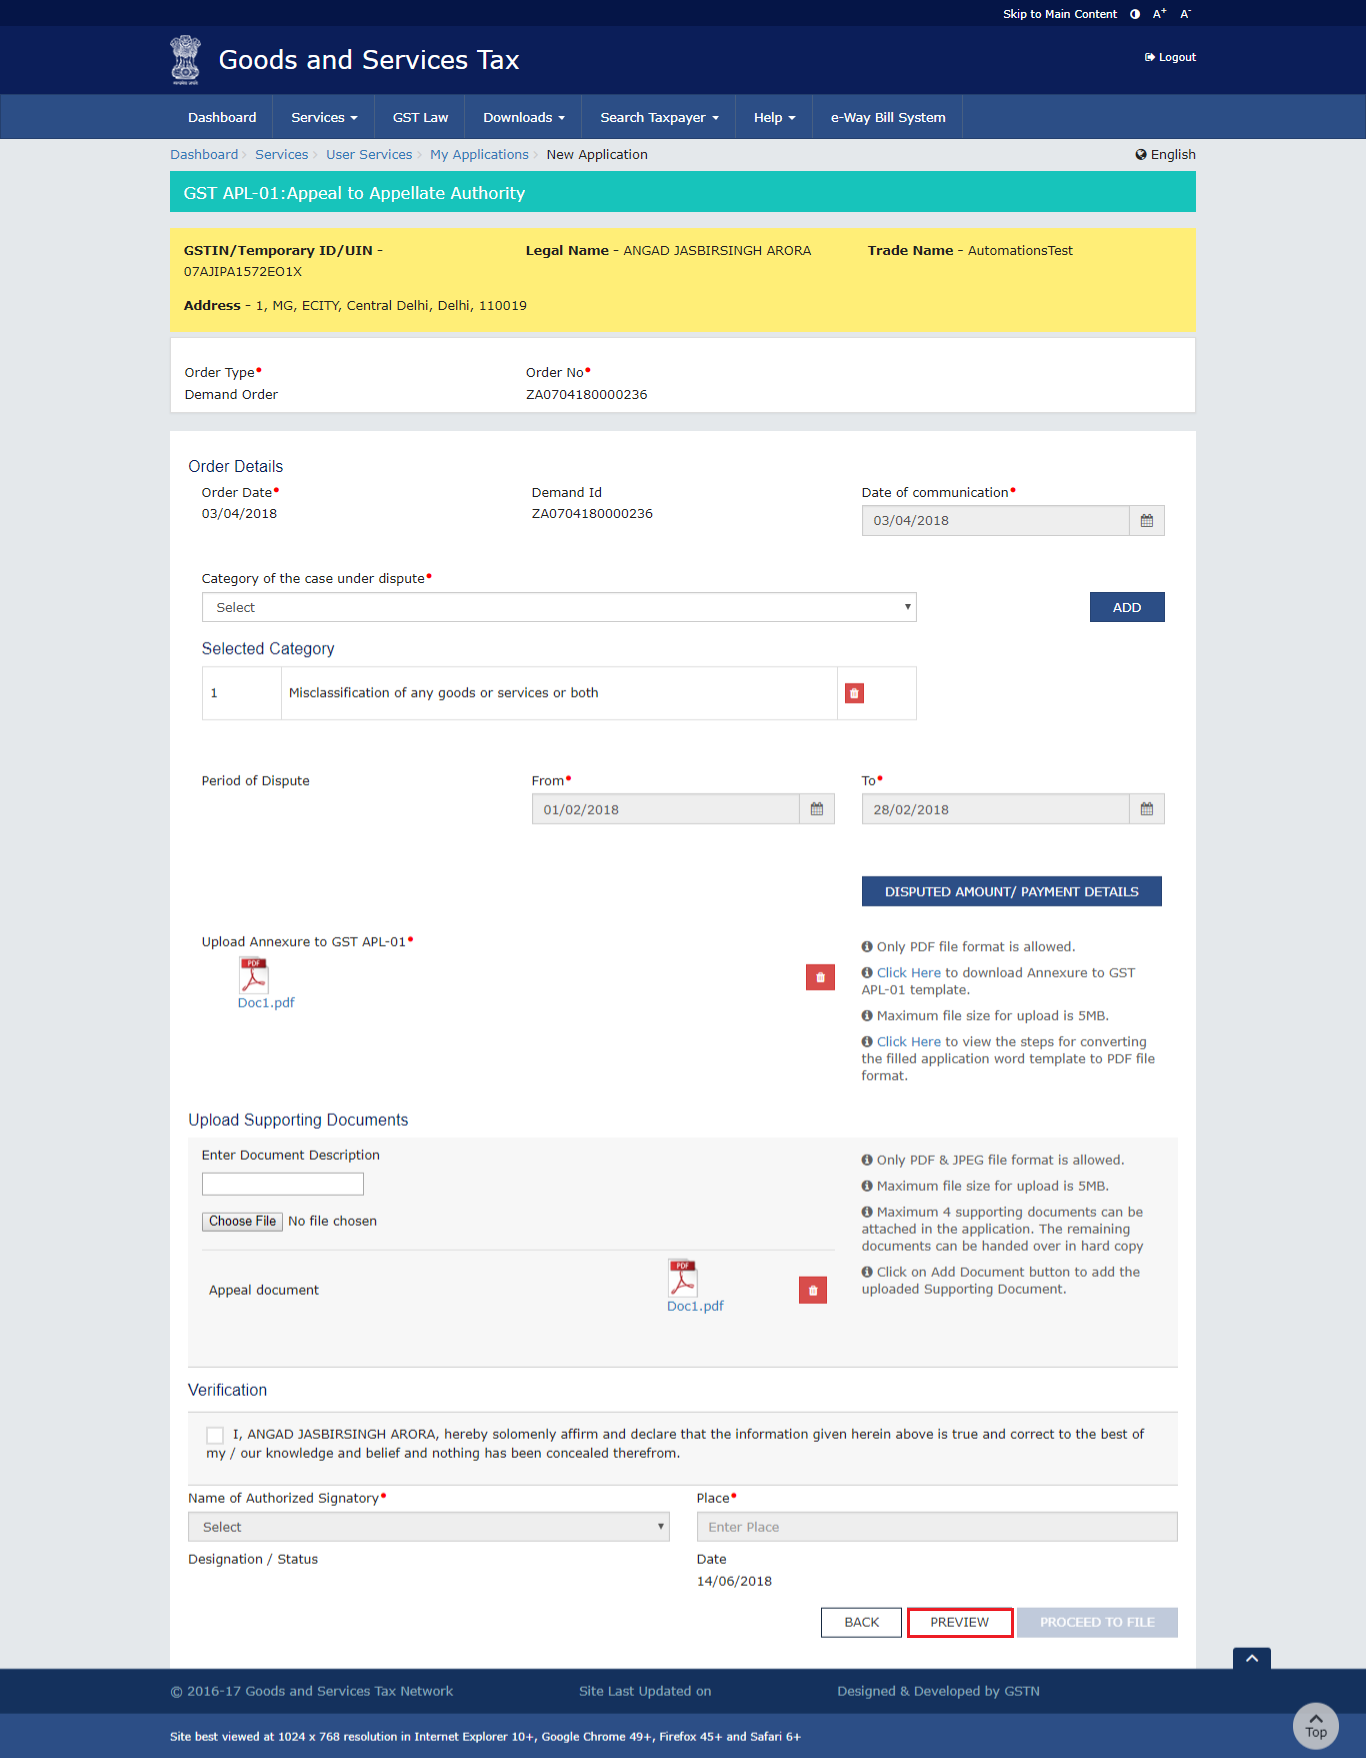
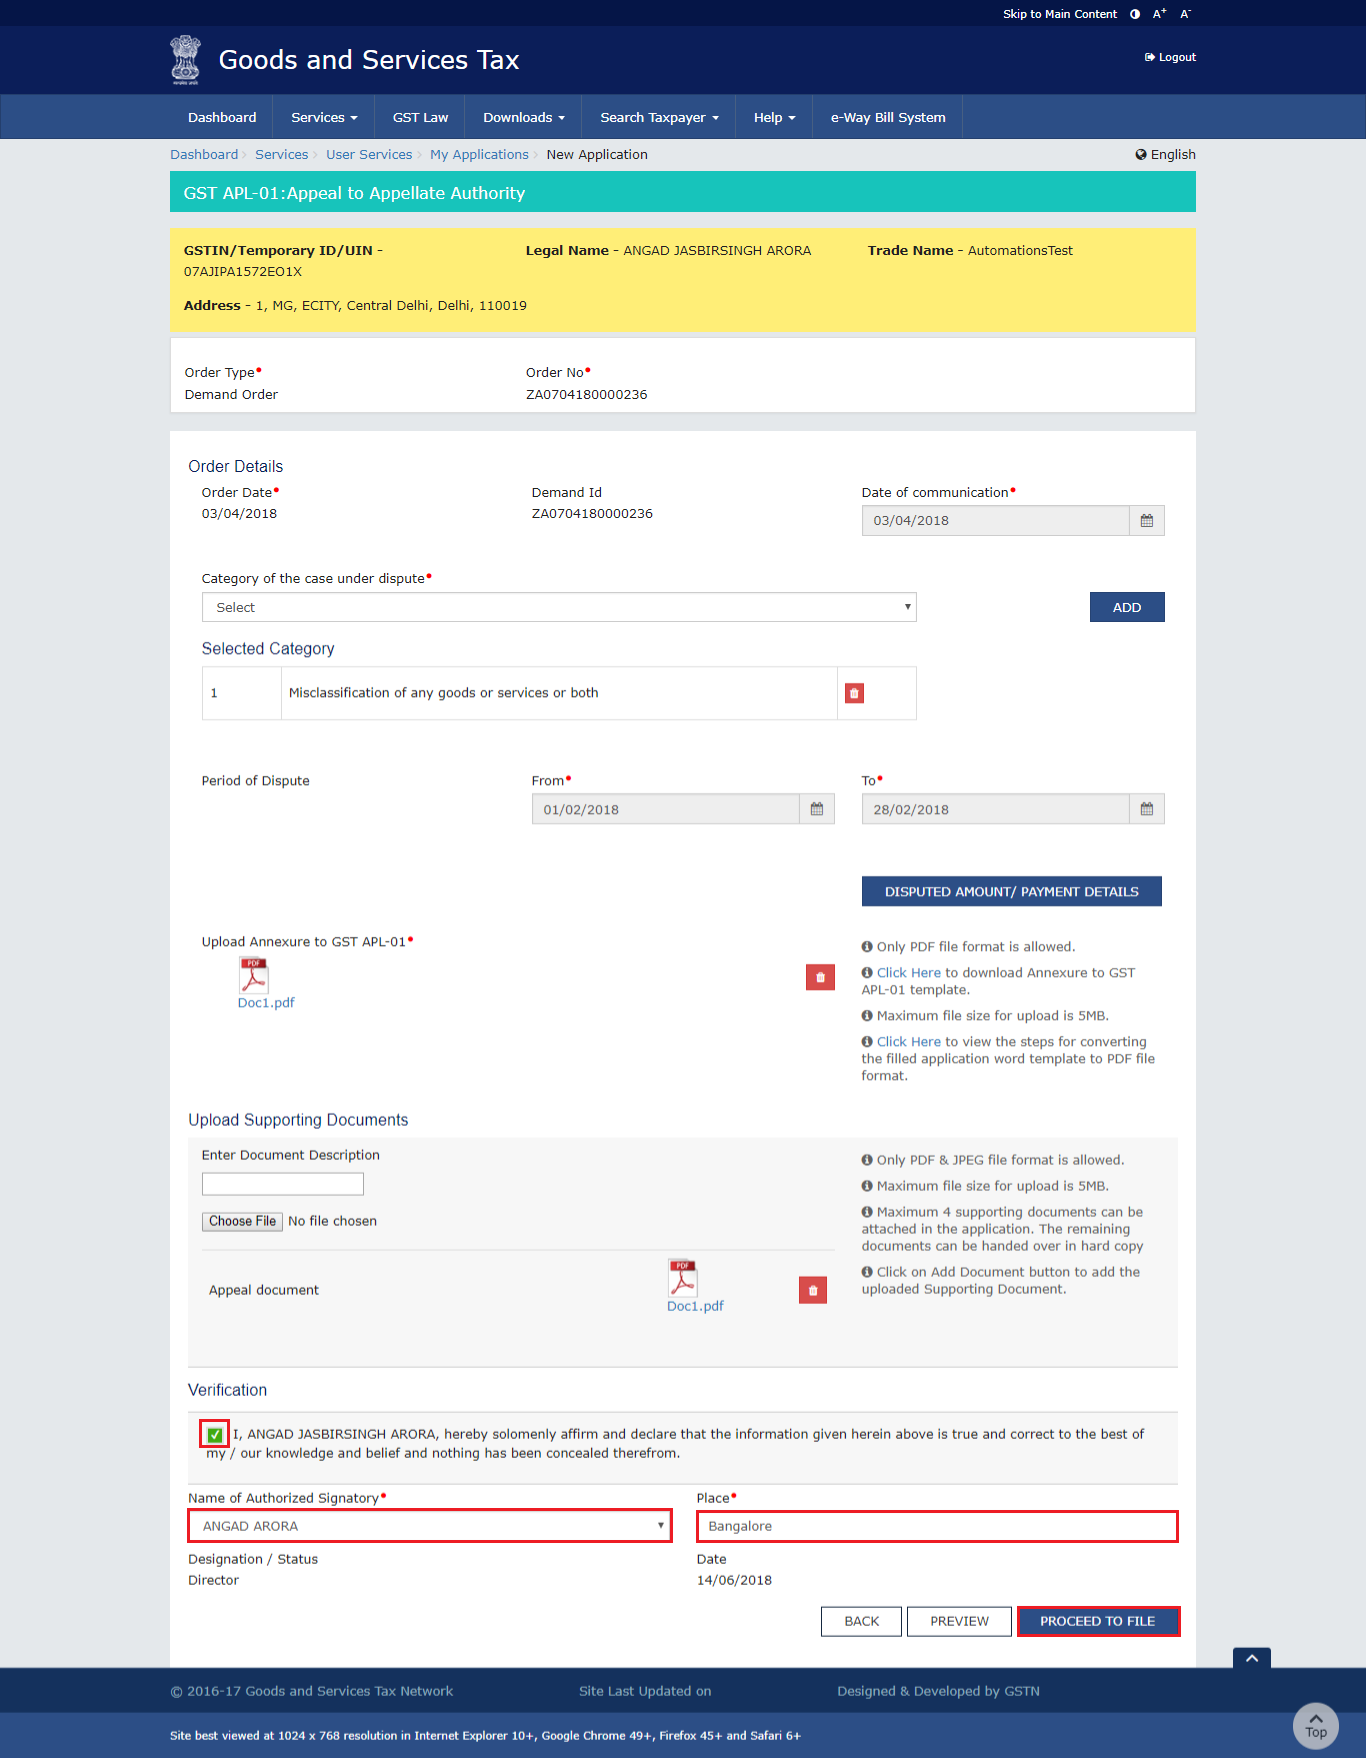
The GST APL-01: Appeal to Appellate Authority page is displayed.
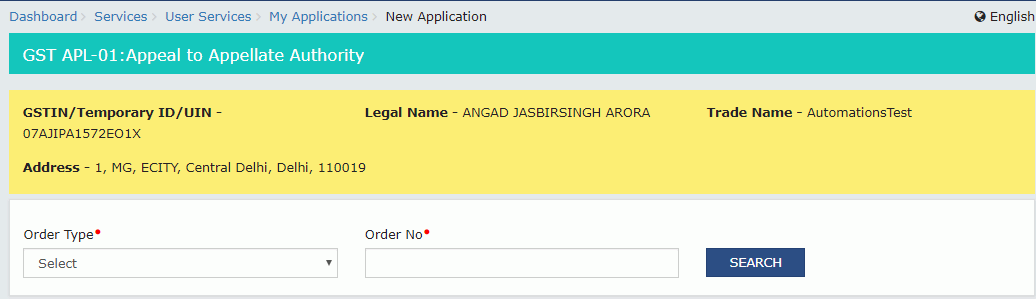
- Select the Order Type as Demand Order from the drop-down list.

-
In the Order No field, enter the Order Number issued by adjudicating authority.
-
Click the SEARCH button.
- The Order Details page is displayed.
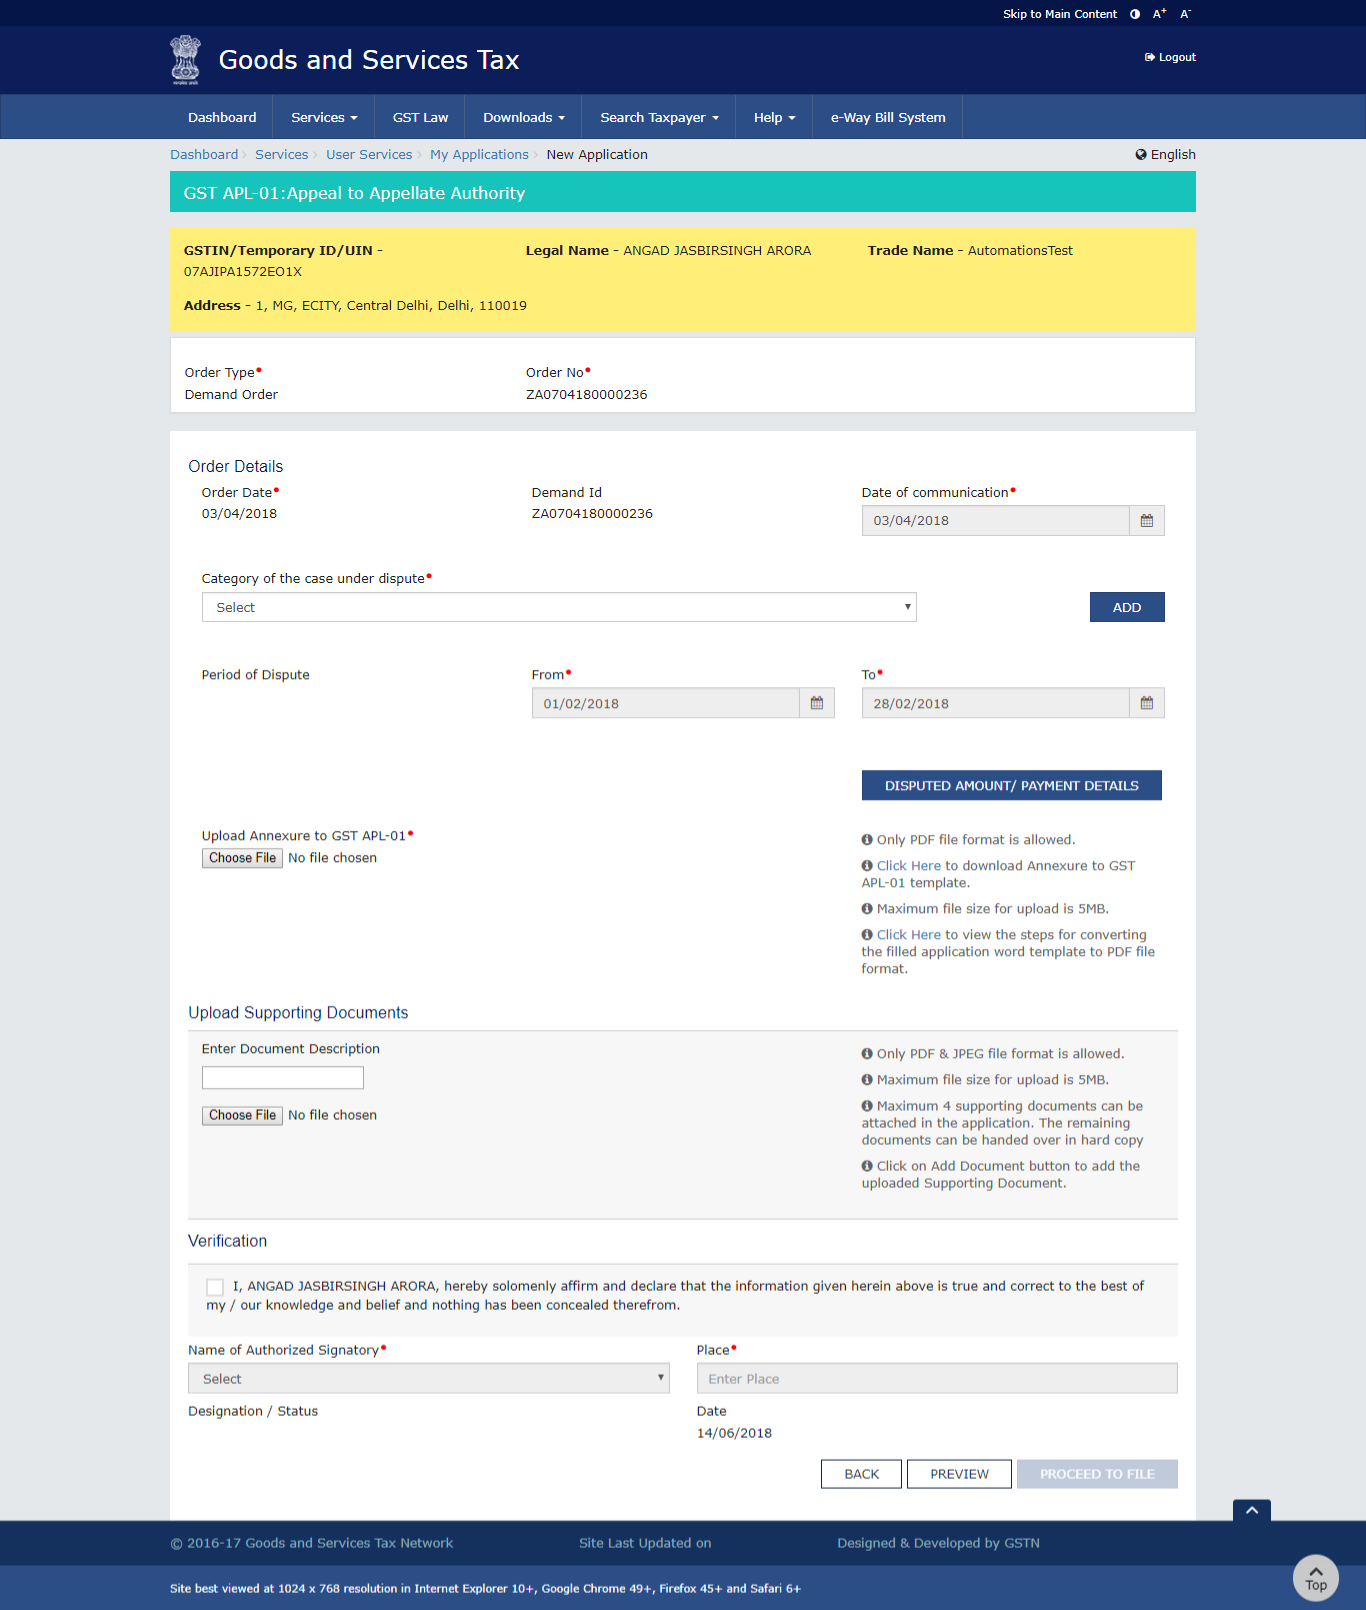
- Select the Category of the case under dispute from the drop-down list.
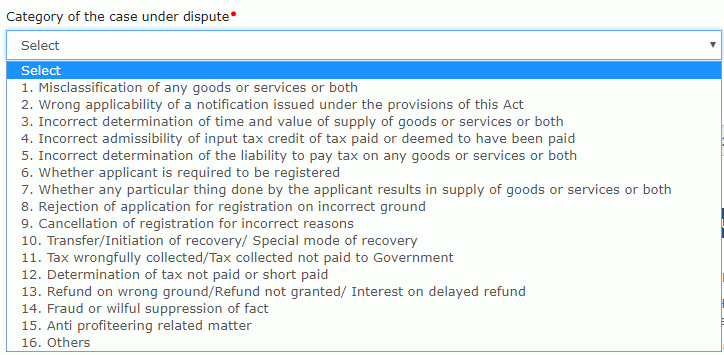
- Click the ADD button.
Note:
Date of Communication and Period of Dispute is displayed on the screen. However, you can edit the same.
You can add multiple line items from the Category of the case under dispute drop-down list by clicking the ADD button.
You can click the DELETE button to delete the details added.

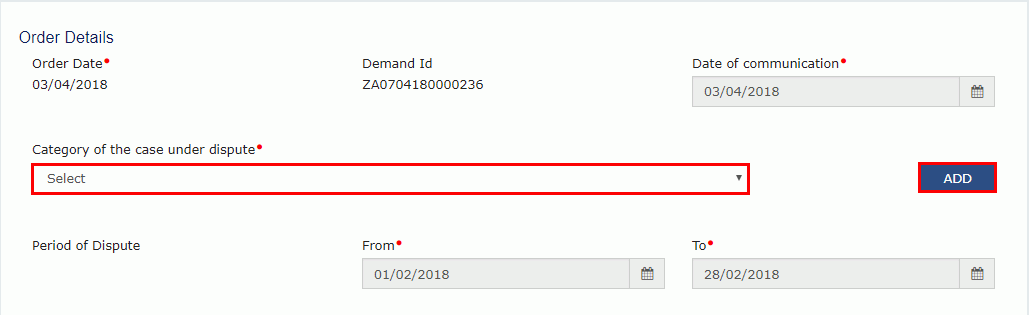
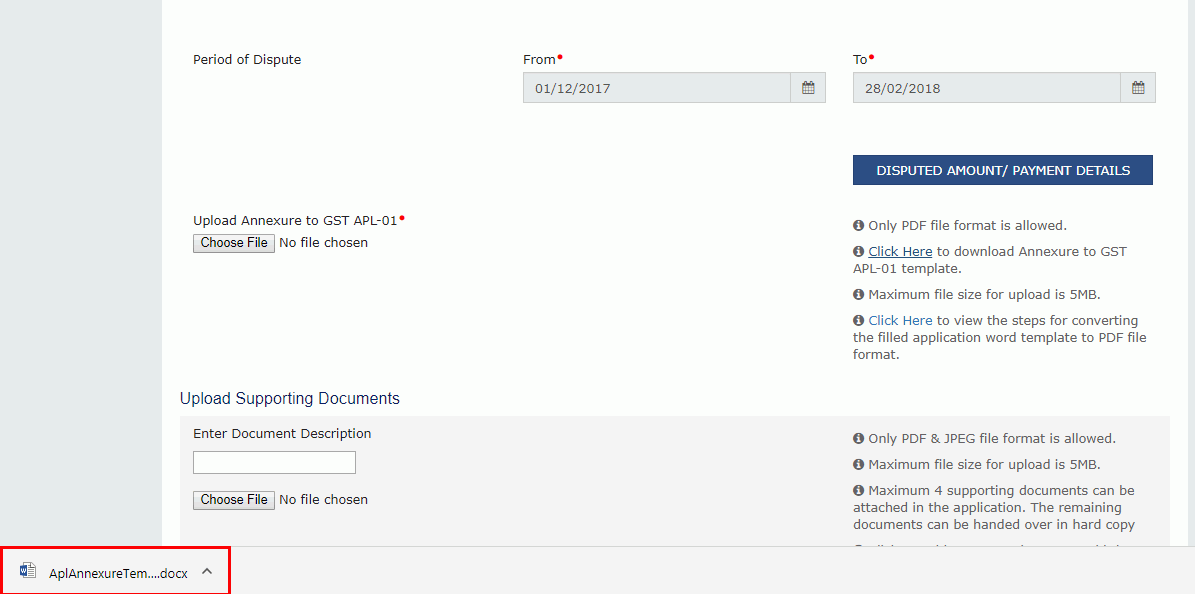
B. Upload Annexure to GST APL-01
- Click the click here link to download the Annexure to GST APL-01 Template.
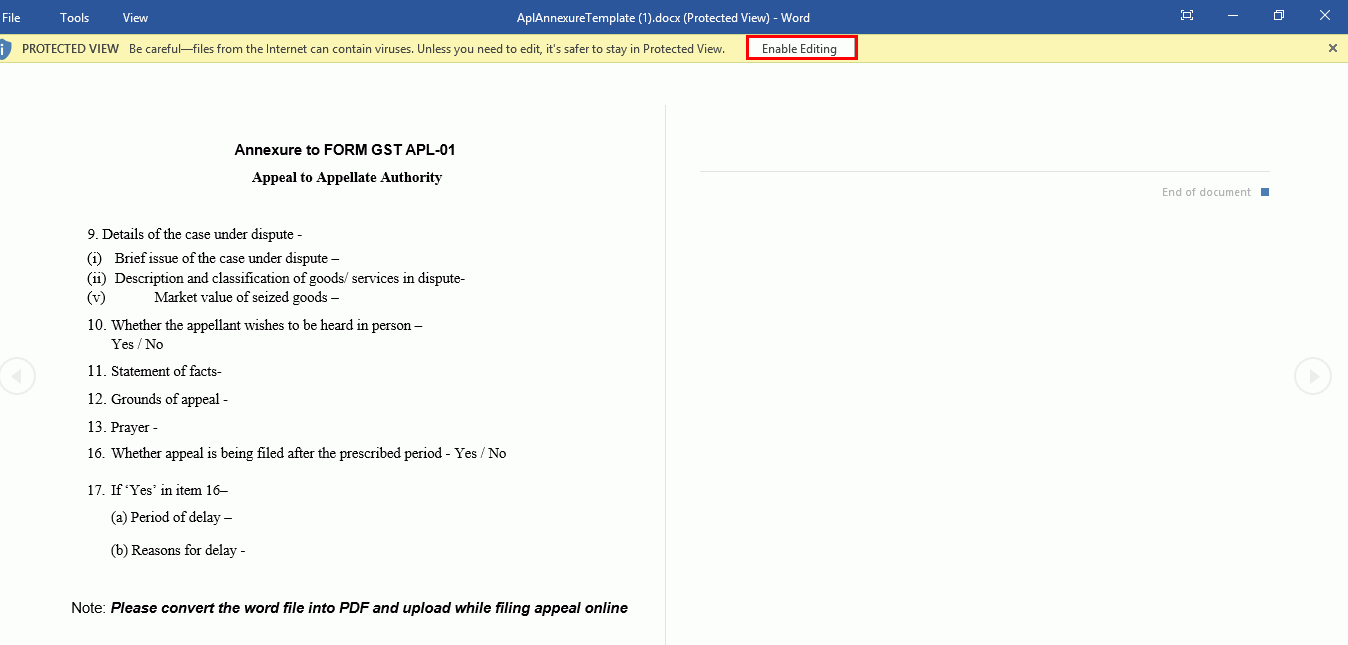
- The GST APL-01 Template is downloaded. Open the downloaded template.
- Click the Enable Editing button.
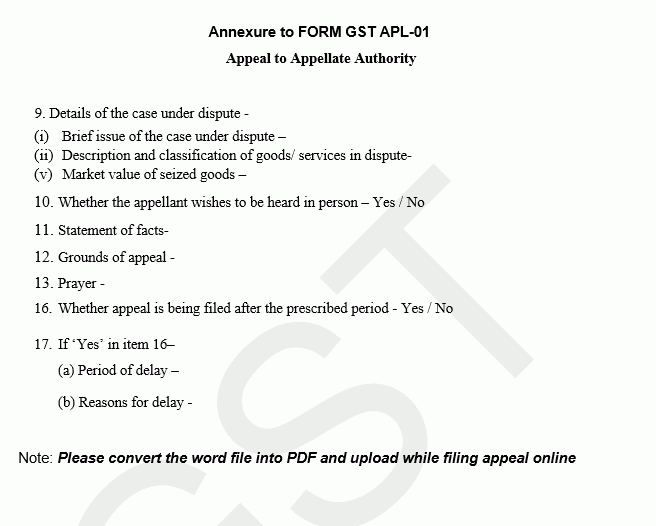
- Enter the details
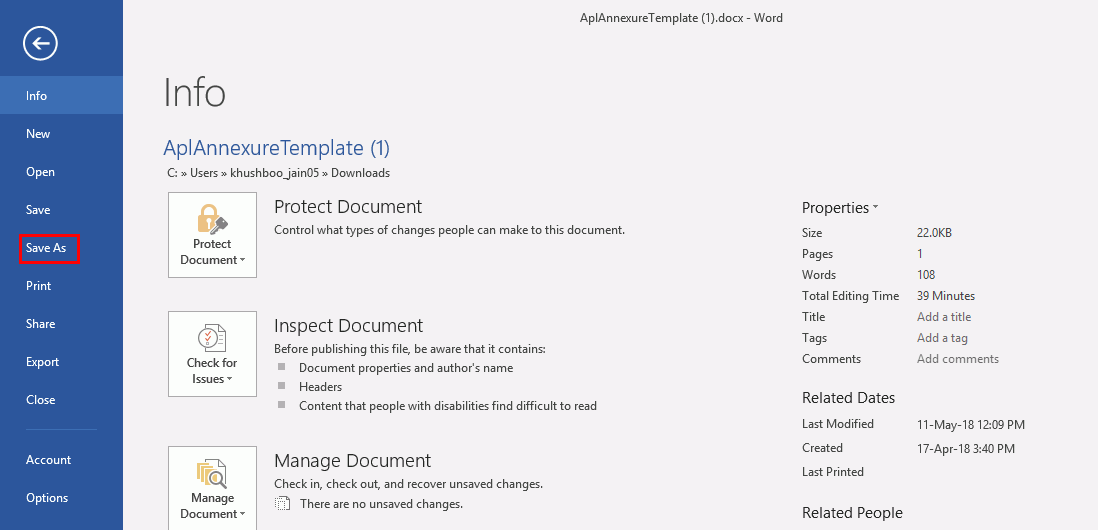
- Once you have entered the details, click on the File button in top left corner.
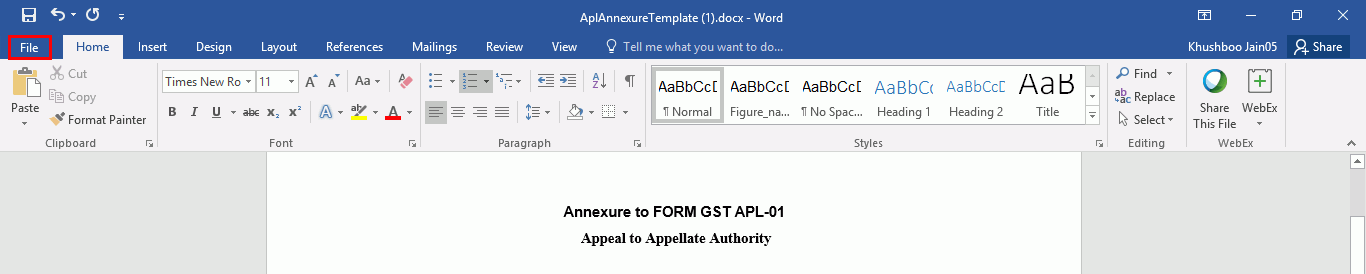
- click the Save As button
-
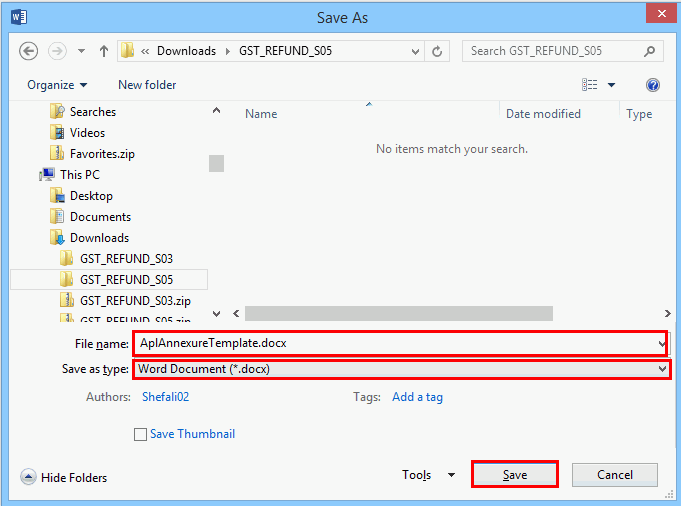
Now select the location to save the file and in the File Name list, type or select a name for the document.
-
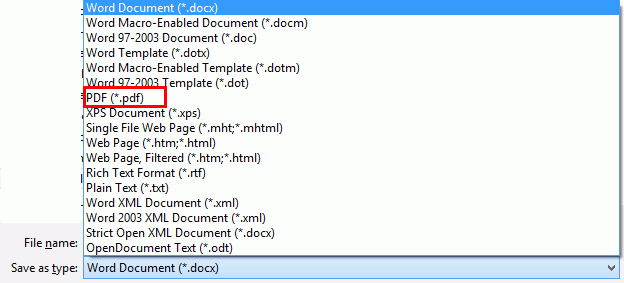
In the Save as type list, select PDF.
- Click the Save button.
Note: You should have a PDF reader installed on your computer to open the PDF file.
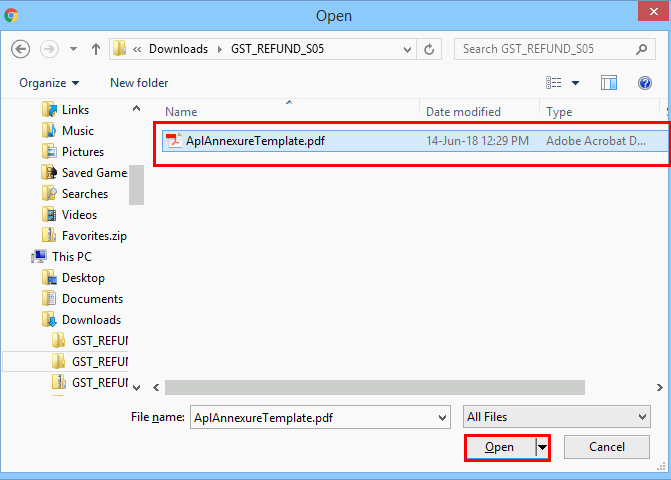
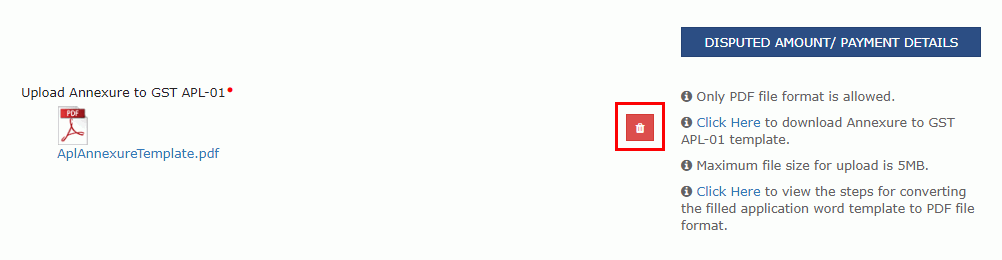
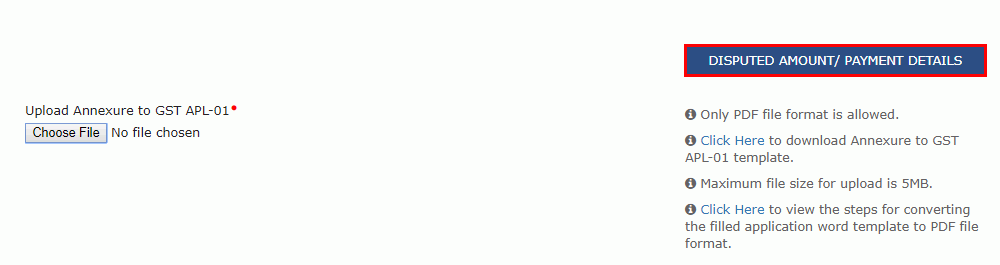
- Click the Choose File button to upload the PDF.
Note: You can upload file with maximum size of upload as 5 MB.

- Select the PDF file which was saved and click the Open button.
- The PDF file is uploaded. You can click the DELETE button to delete the uploaded PDF file.
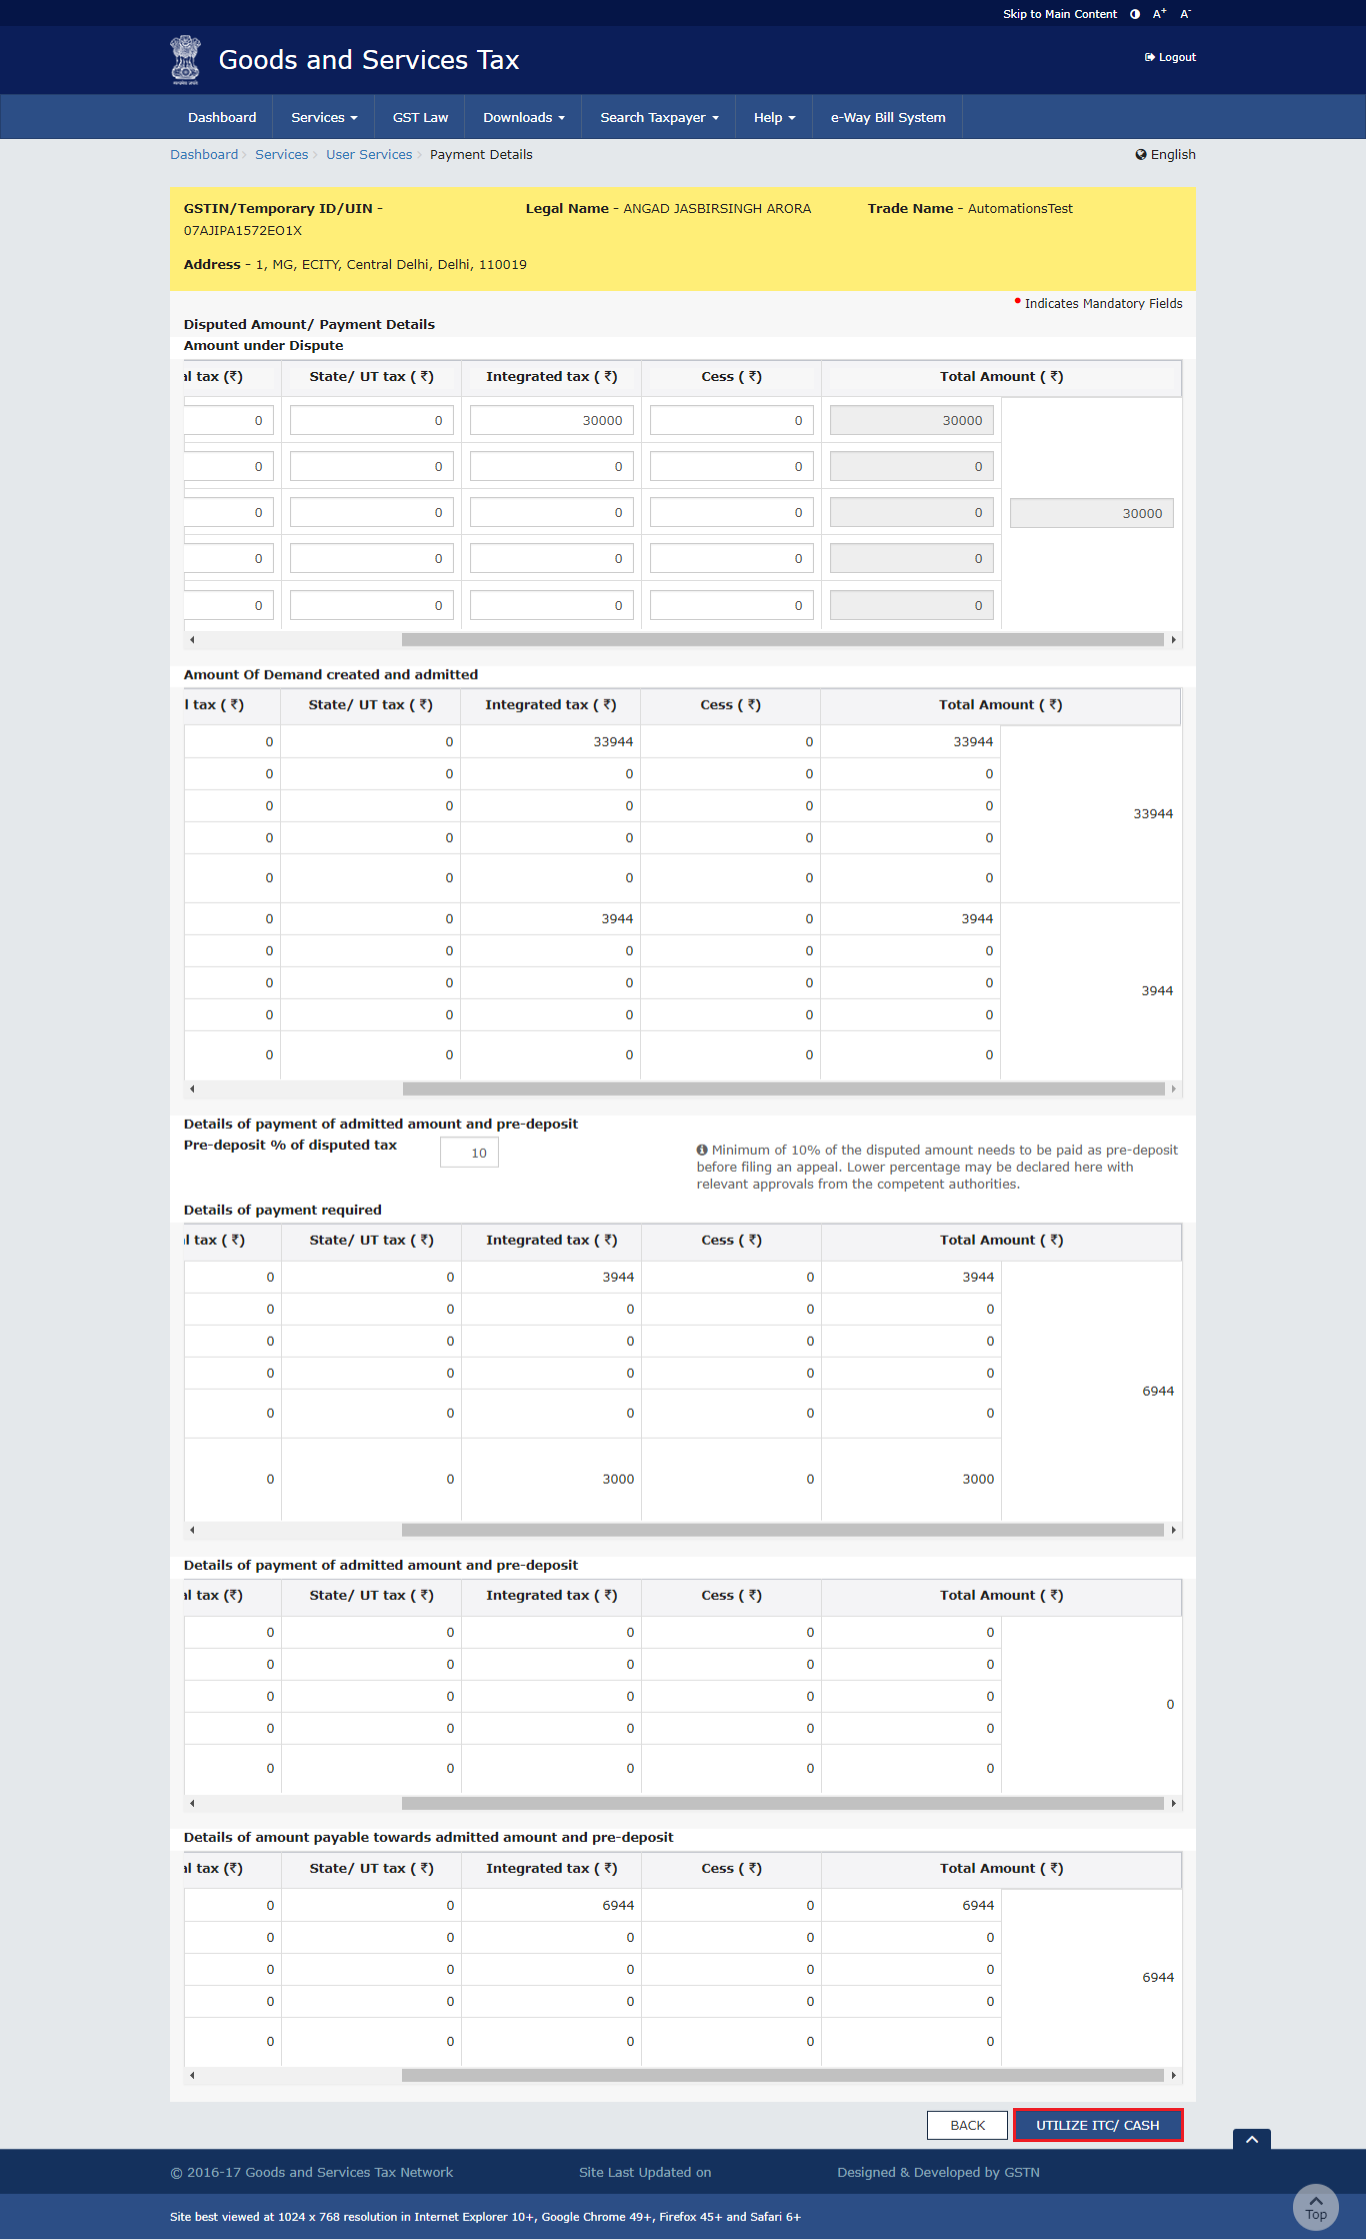
C. Disputed Amount/ Payment Details
- Click the DISPUTED AMOUNT/PAYMENT DETAILS button to enter disputed amount and payment details.
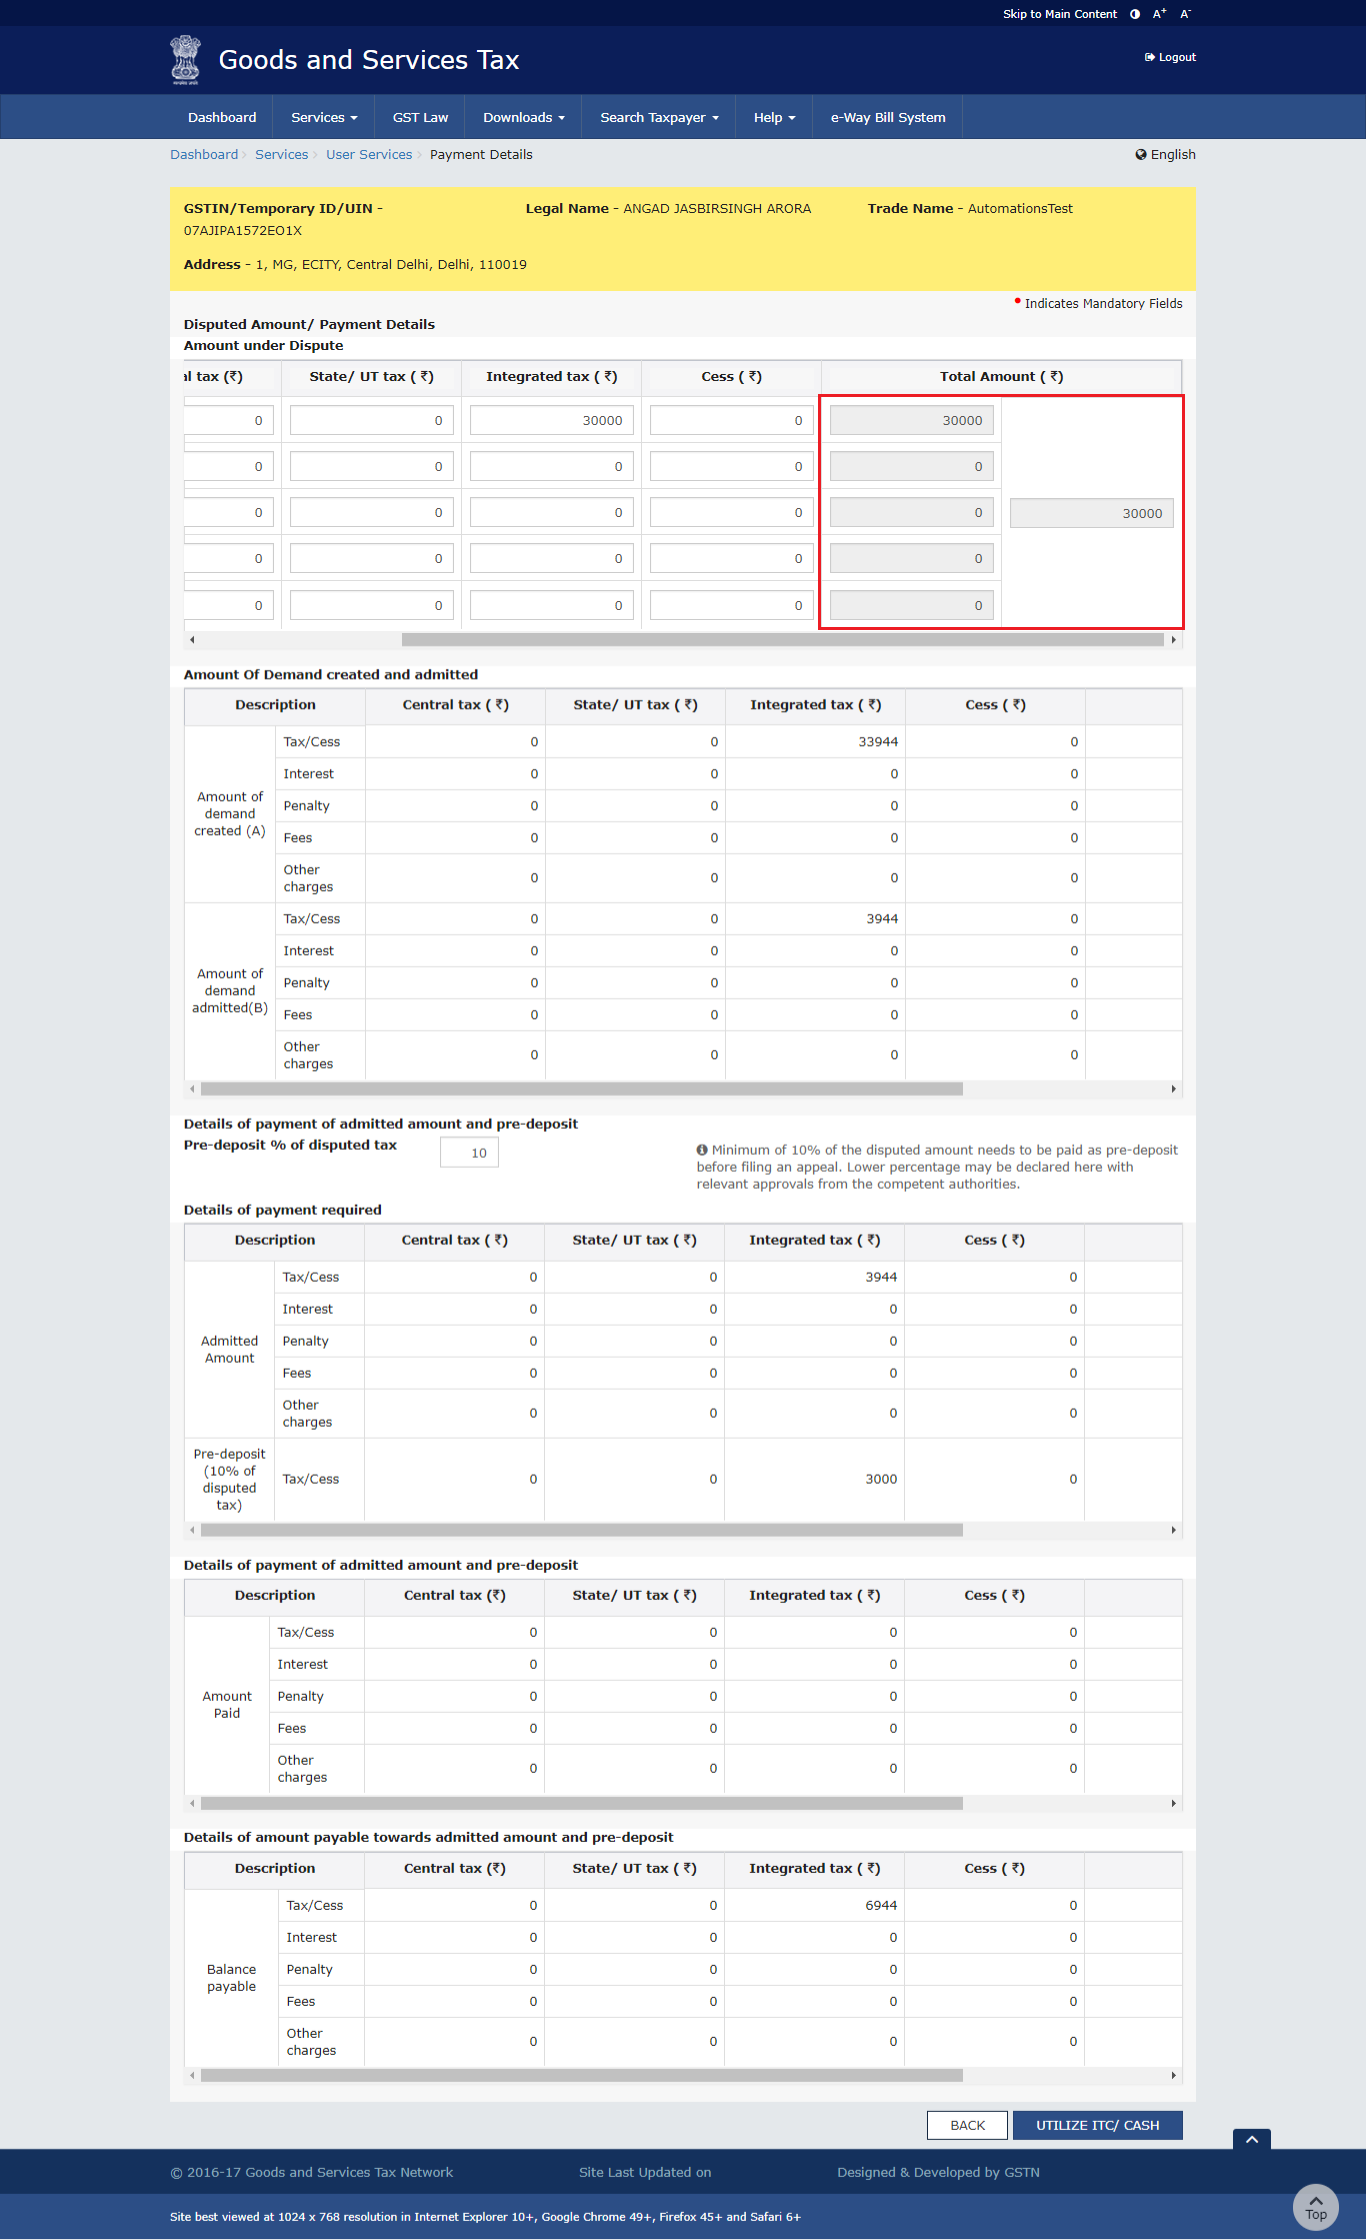
- The Disputed Amount/ Payment Details page is displayed.
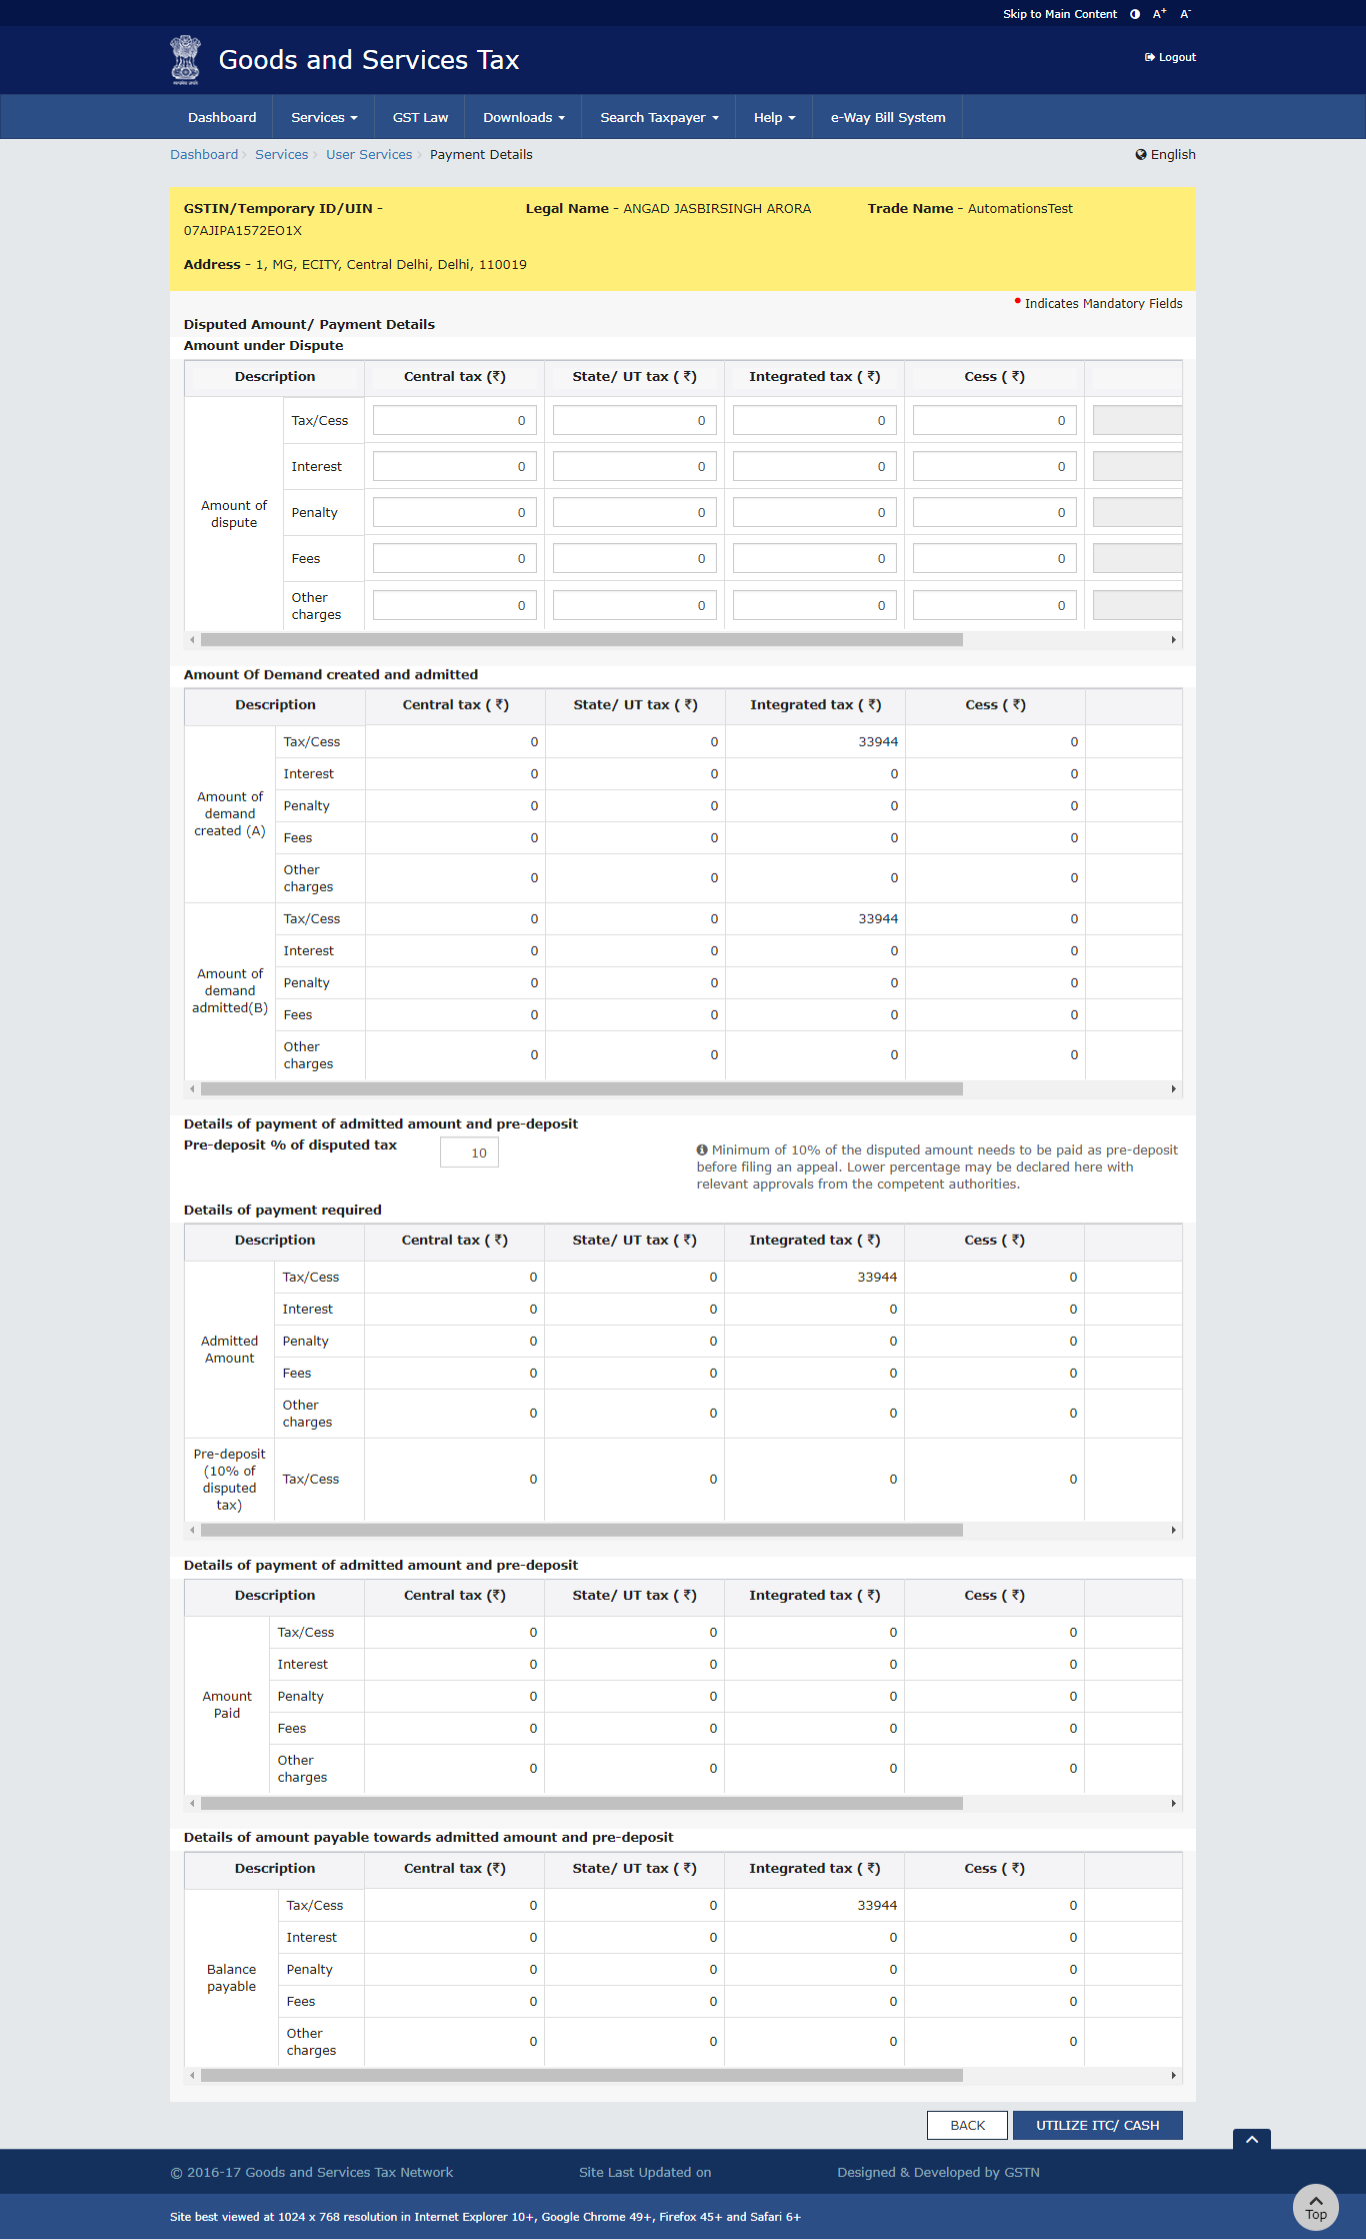
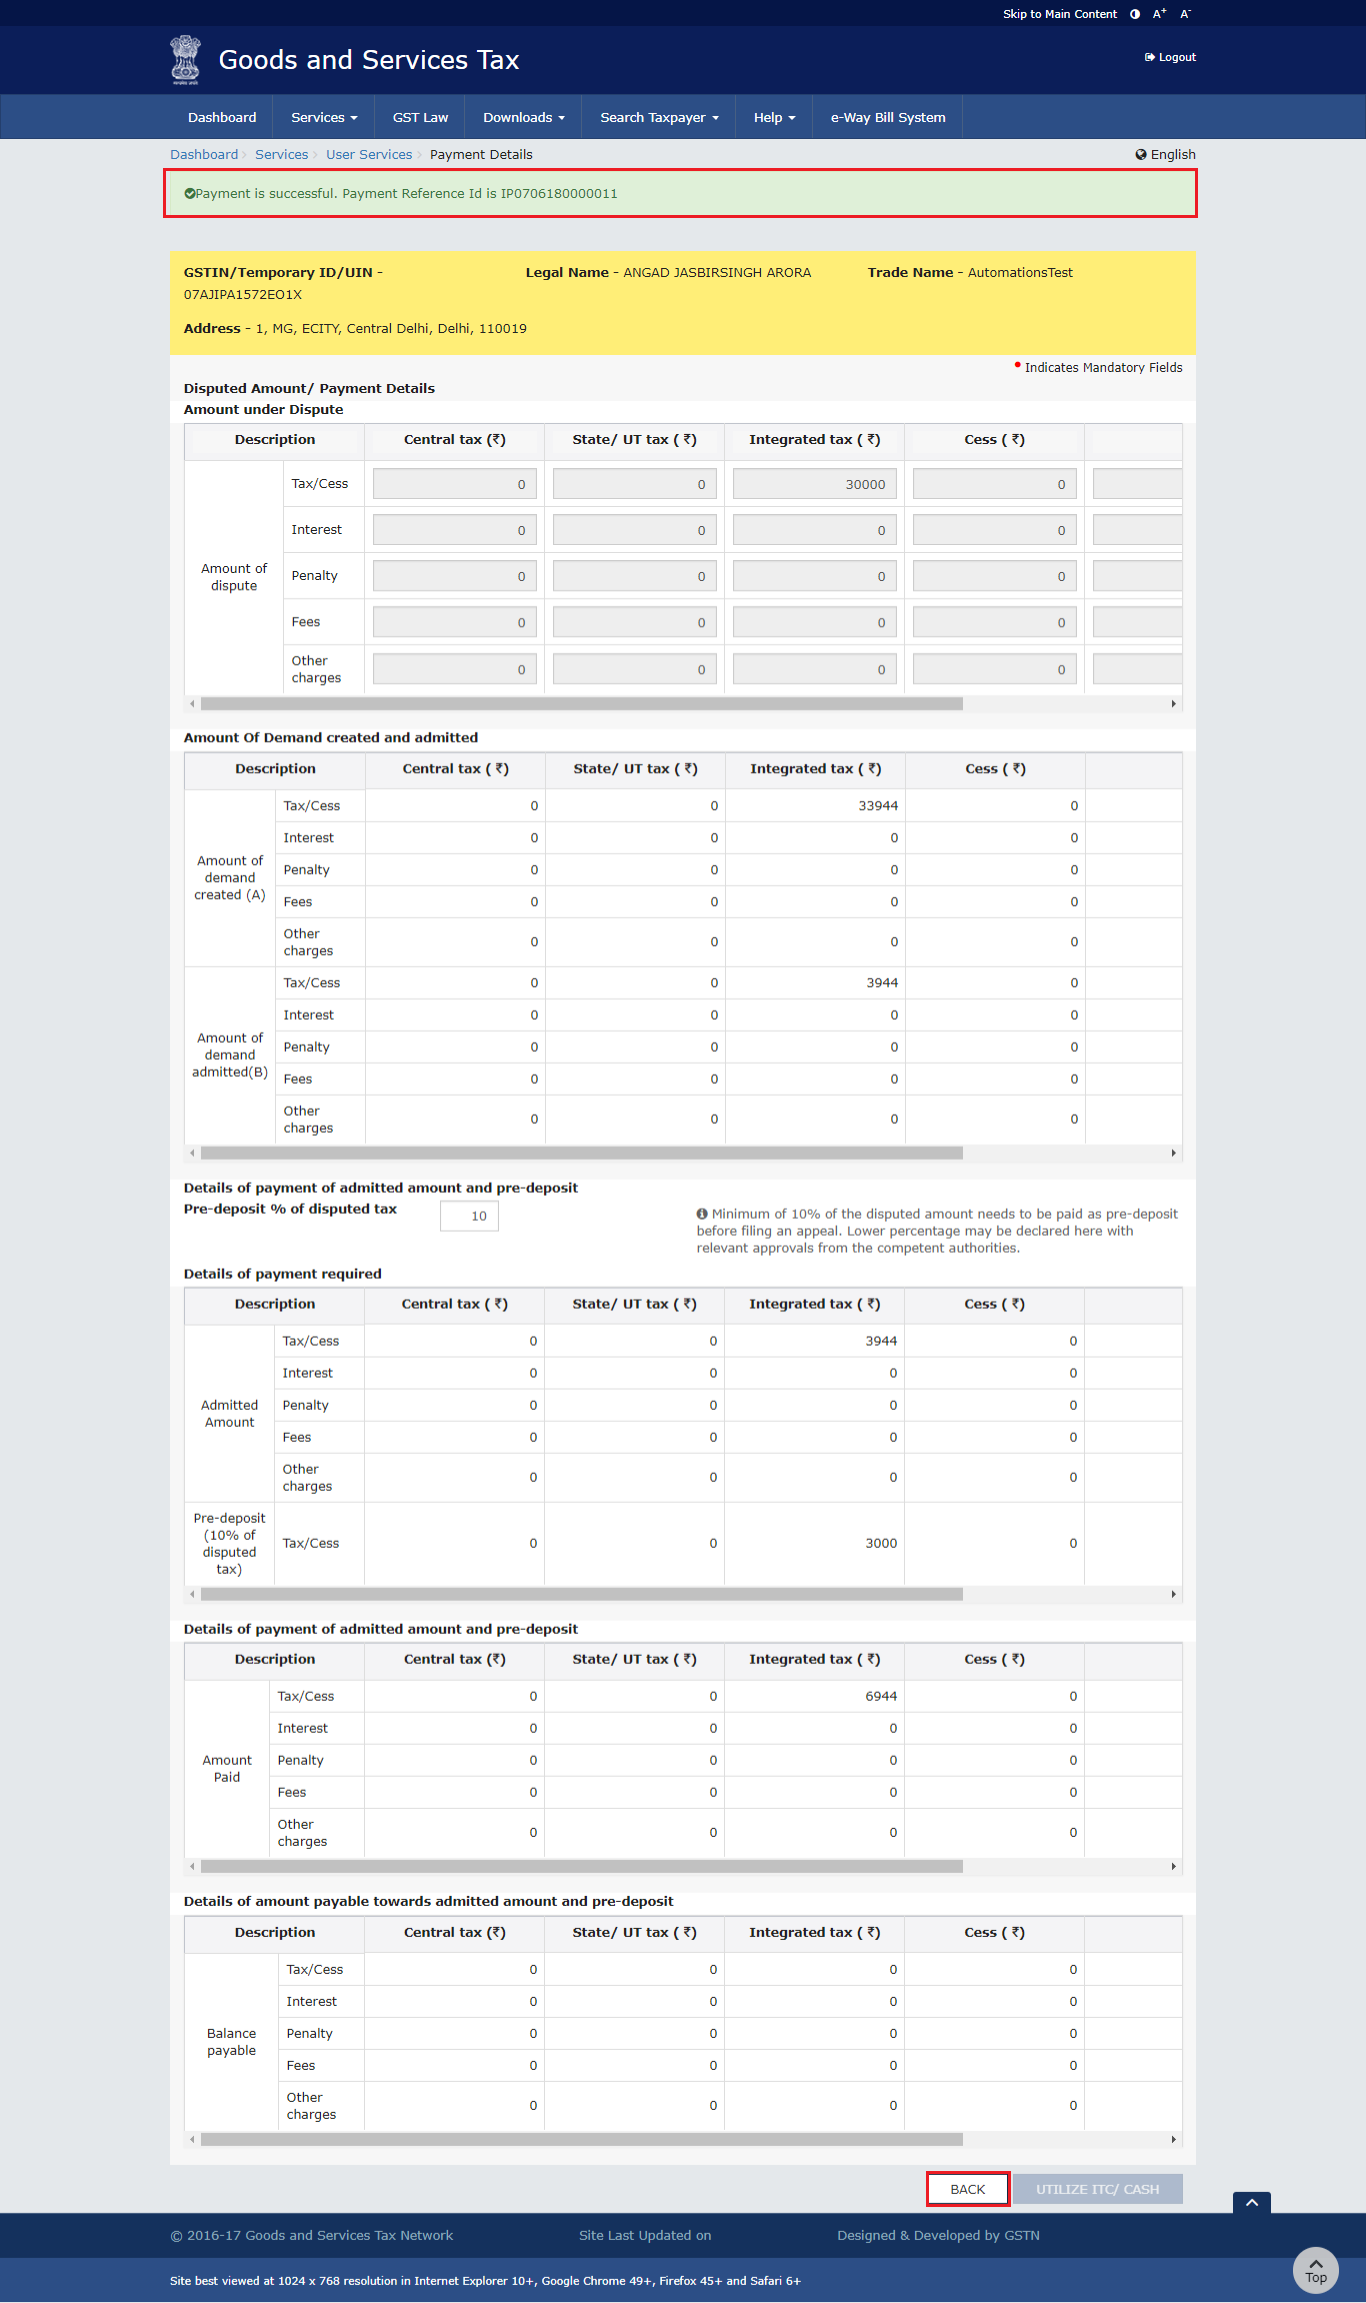
- (a) In the Amount under Dispute section, enter the amount which is under dispute. Amount under Dispute cannot be more than Amount of Demand Created.
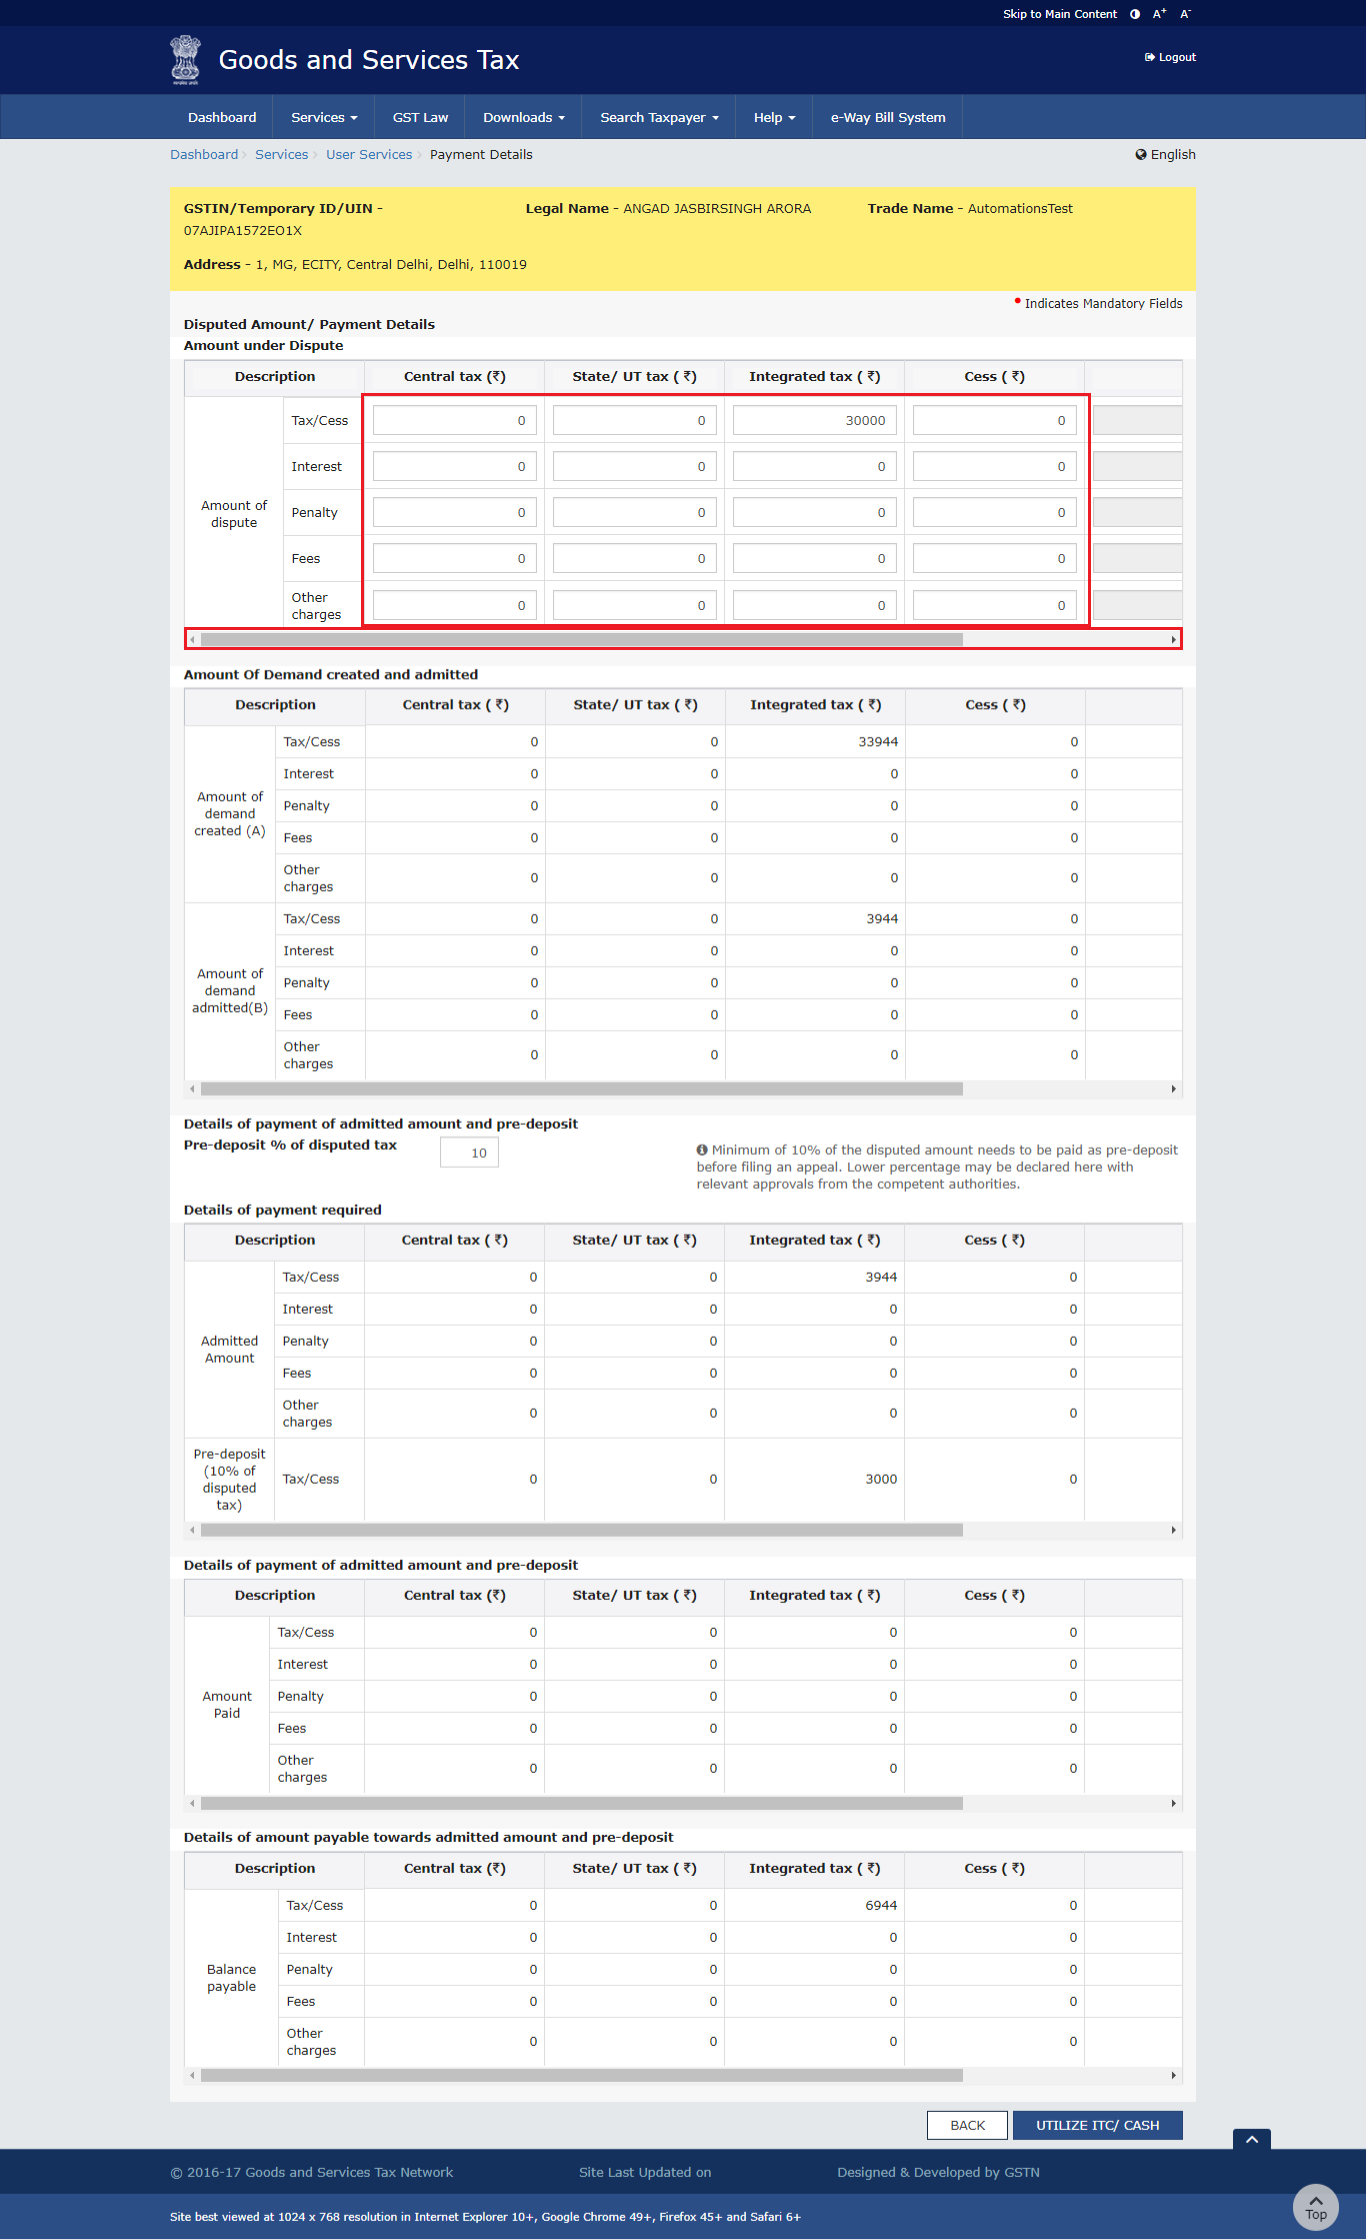
- (b) Use the scroll bar to view the Total Amount under dispute.
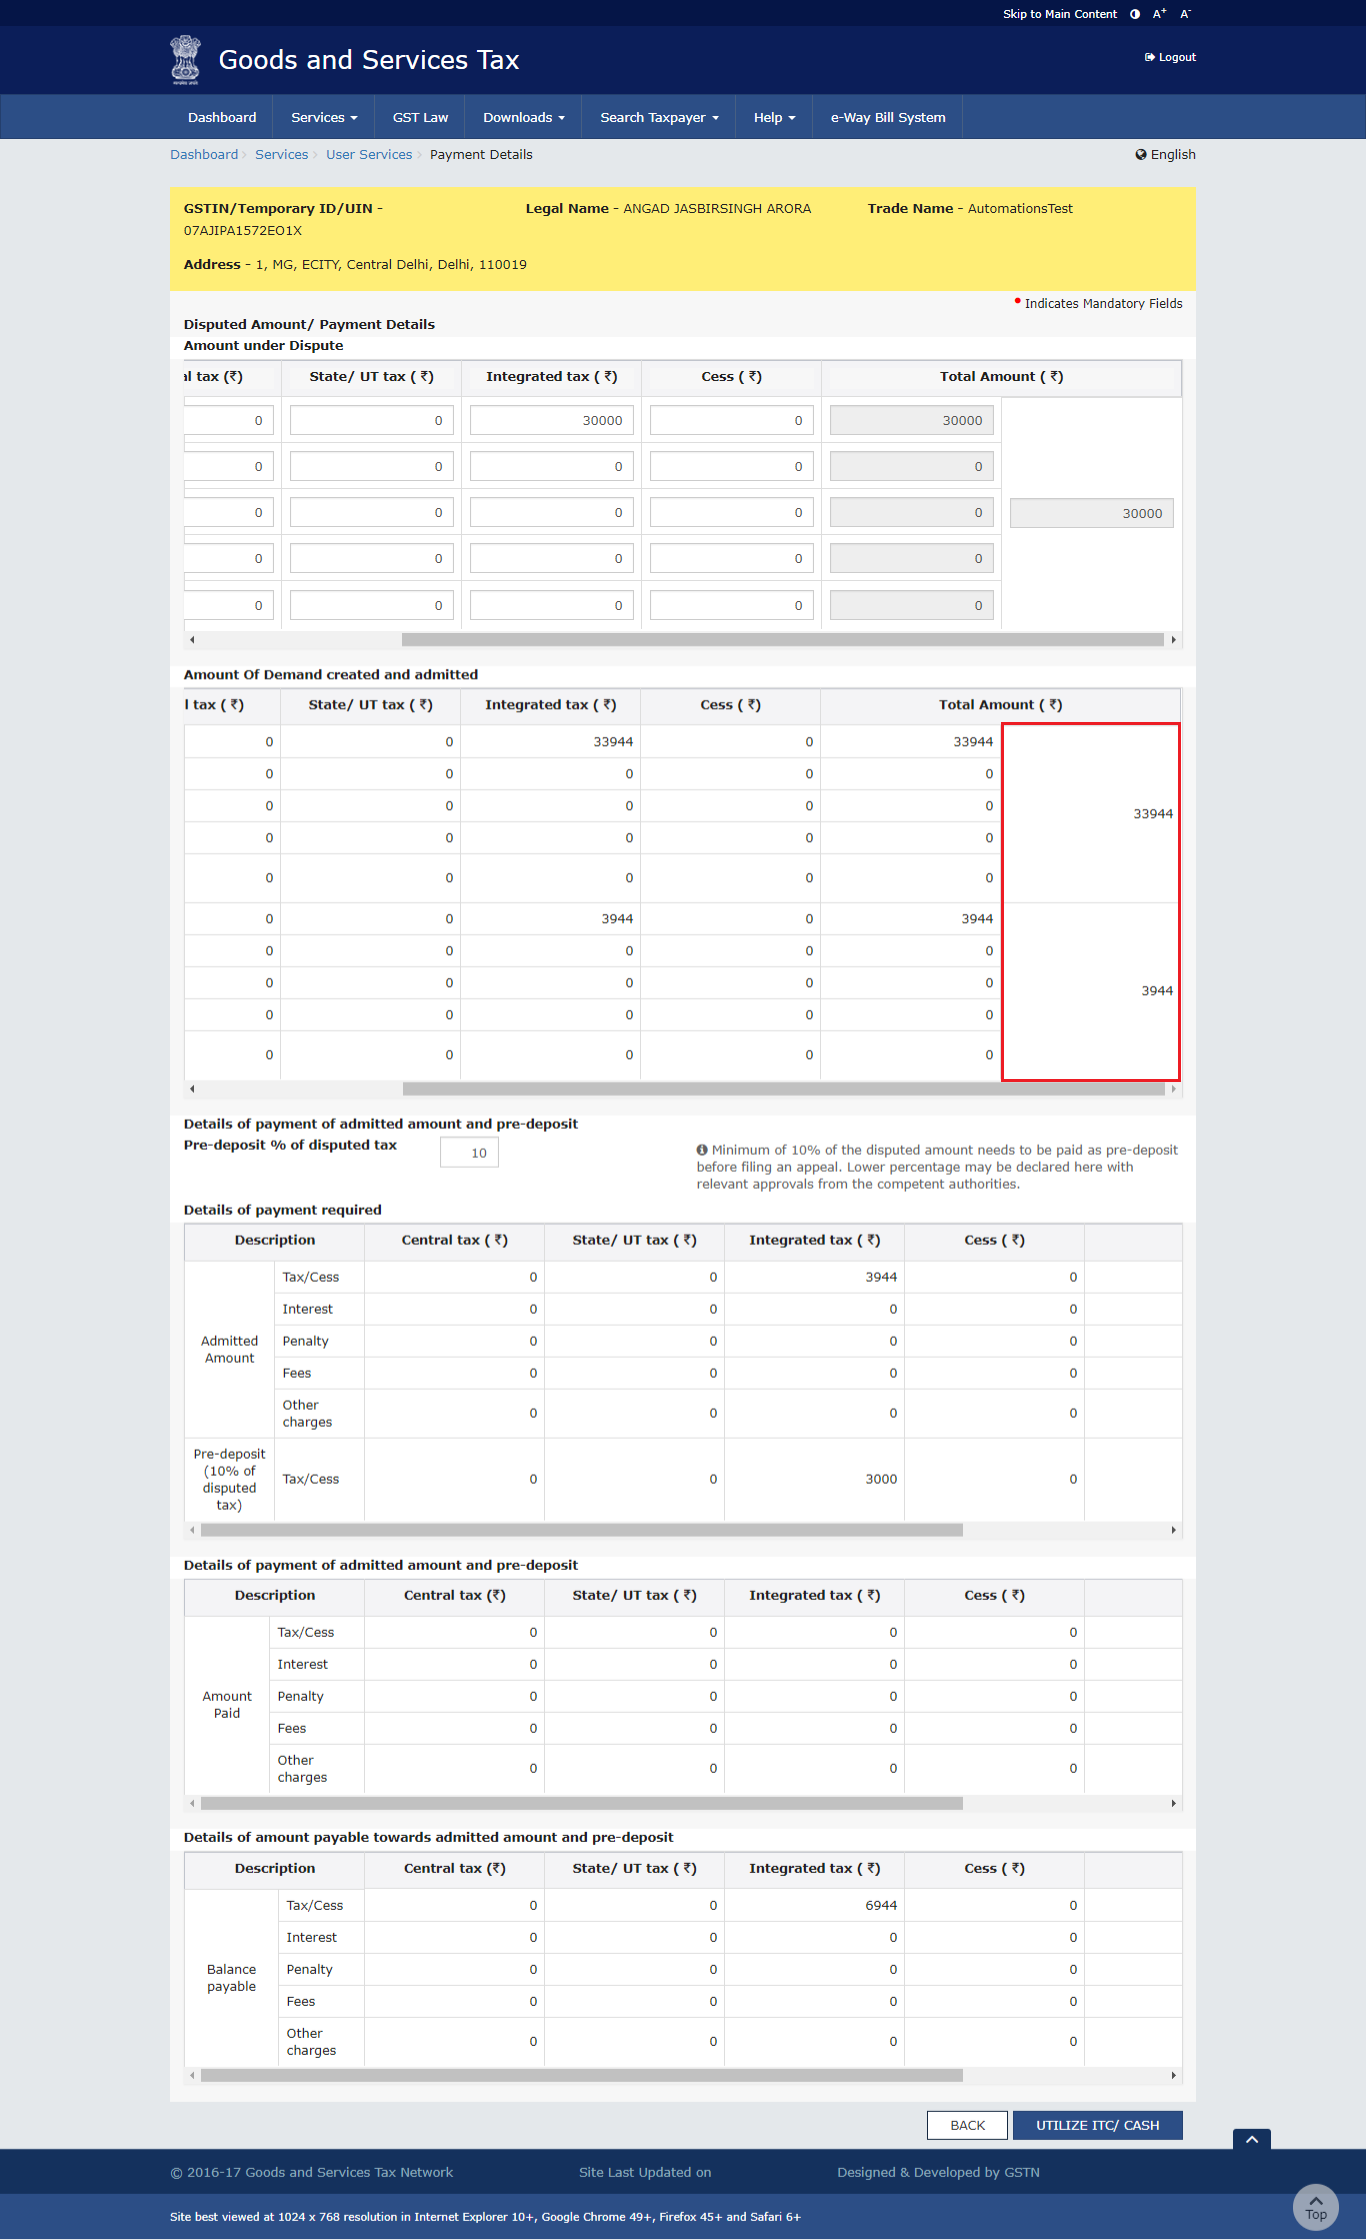
- (a). Amount of Demand created and admitted is displayed in this section.
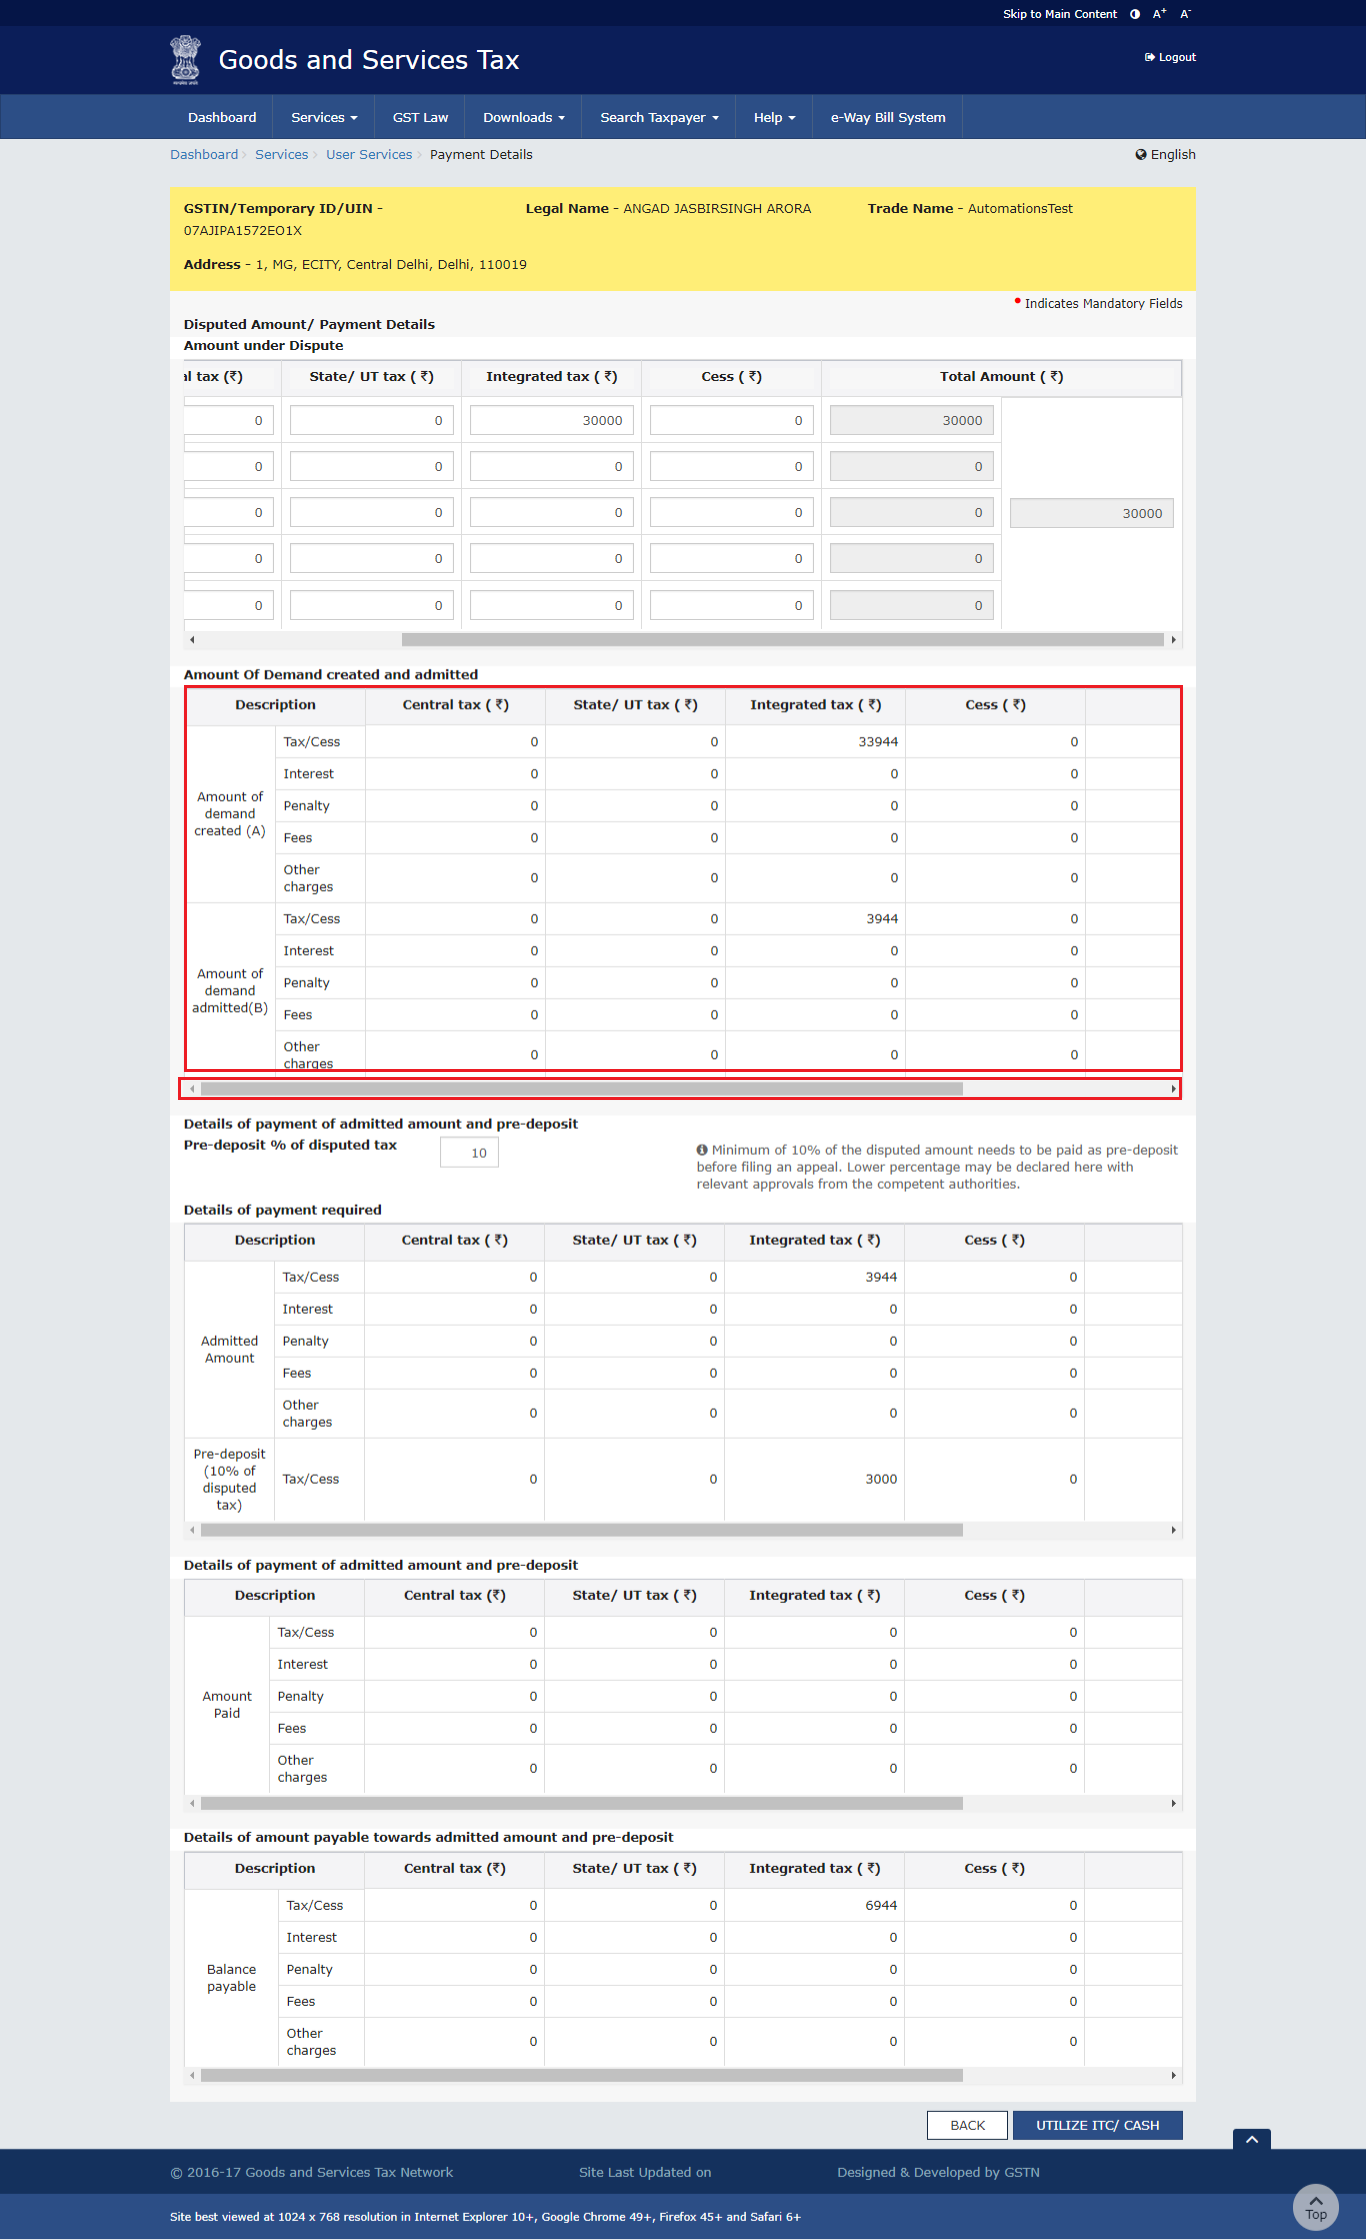
- (b). Use the scroll bar to view the Total Amount of Demand created and admitted.
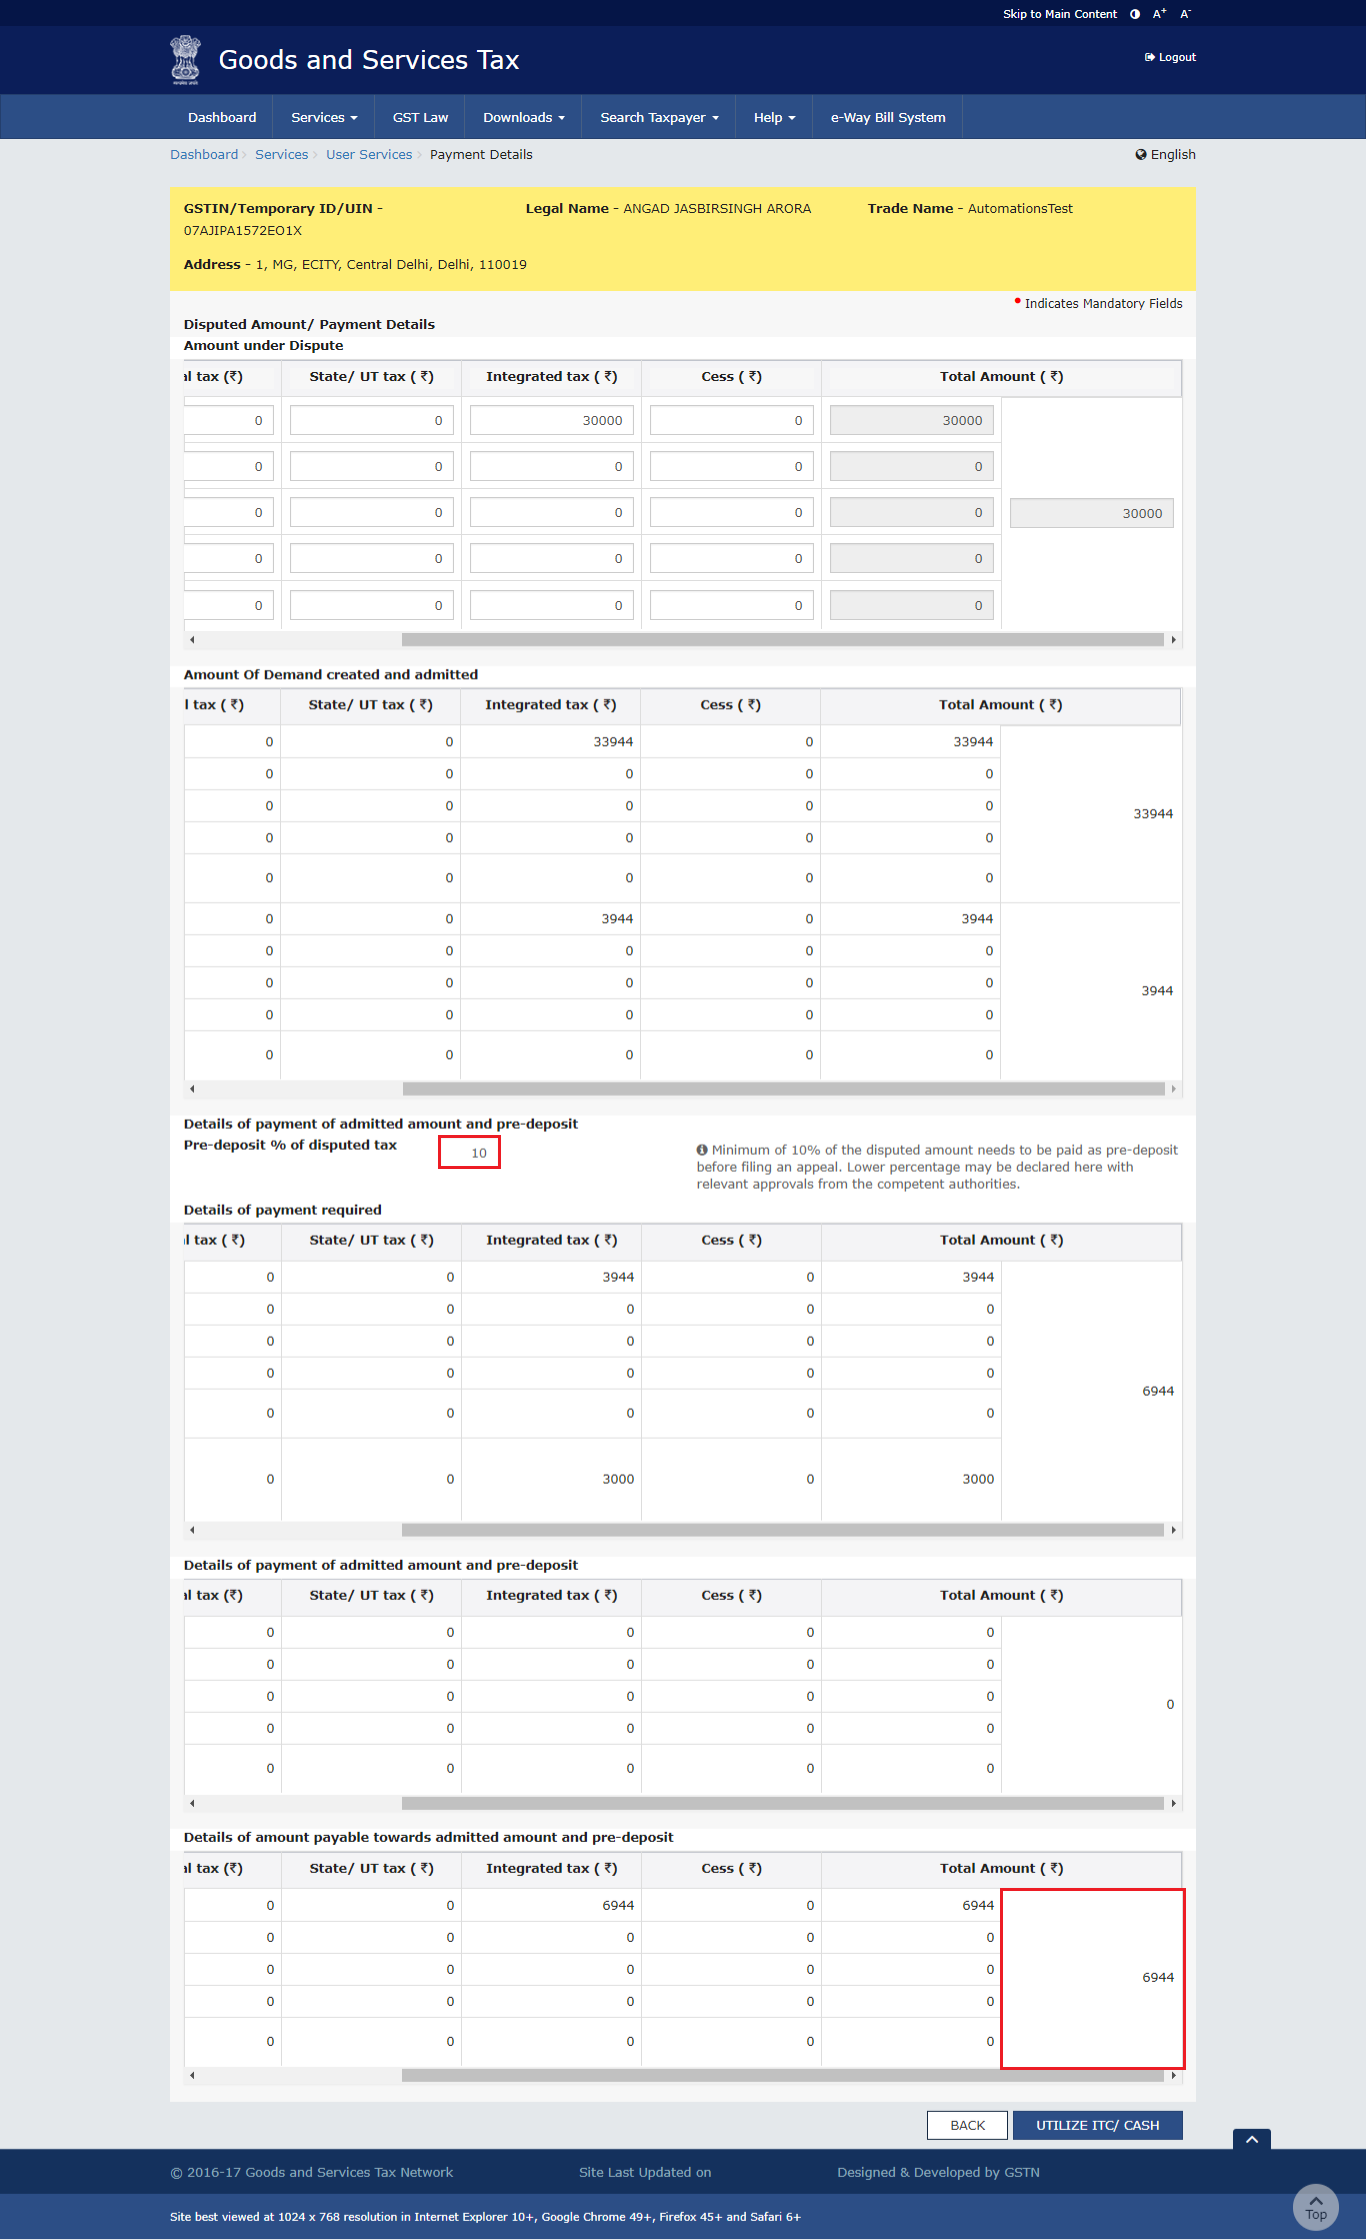
D. Pre-deposit % of disputed tax
- Pre-deposit % of disputed tax field will have 10% as default value.
Note: Minimum of 10% of the disputed amount needs to be paid as pre-deposit before filing an appeal. Lower percentage may be declared here after approval from the competent authorities.
Based on the percentage entered, Details of payment required, Details of payment of admitted amount and pre-deposit and Details of amount payable towards admitted amount and pre-deposit sections are auto-populated.
E. Utilize Cash/ ITC
- Click the UTILIZE ITC/CASH button.
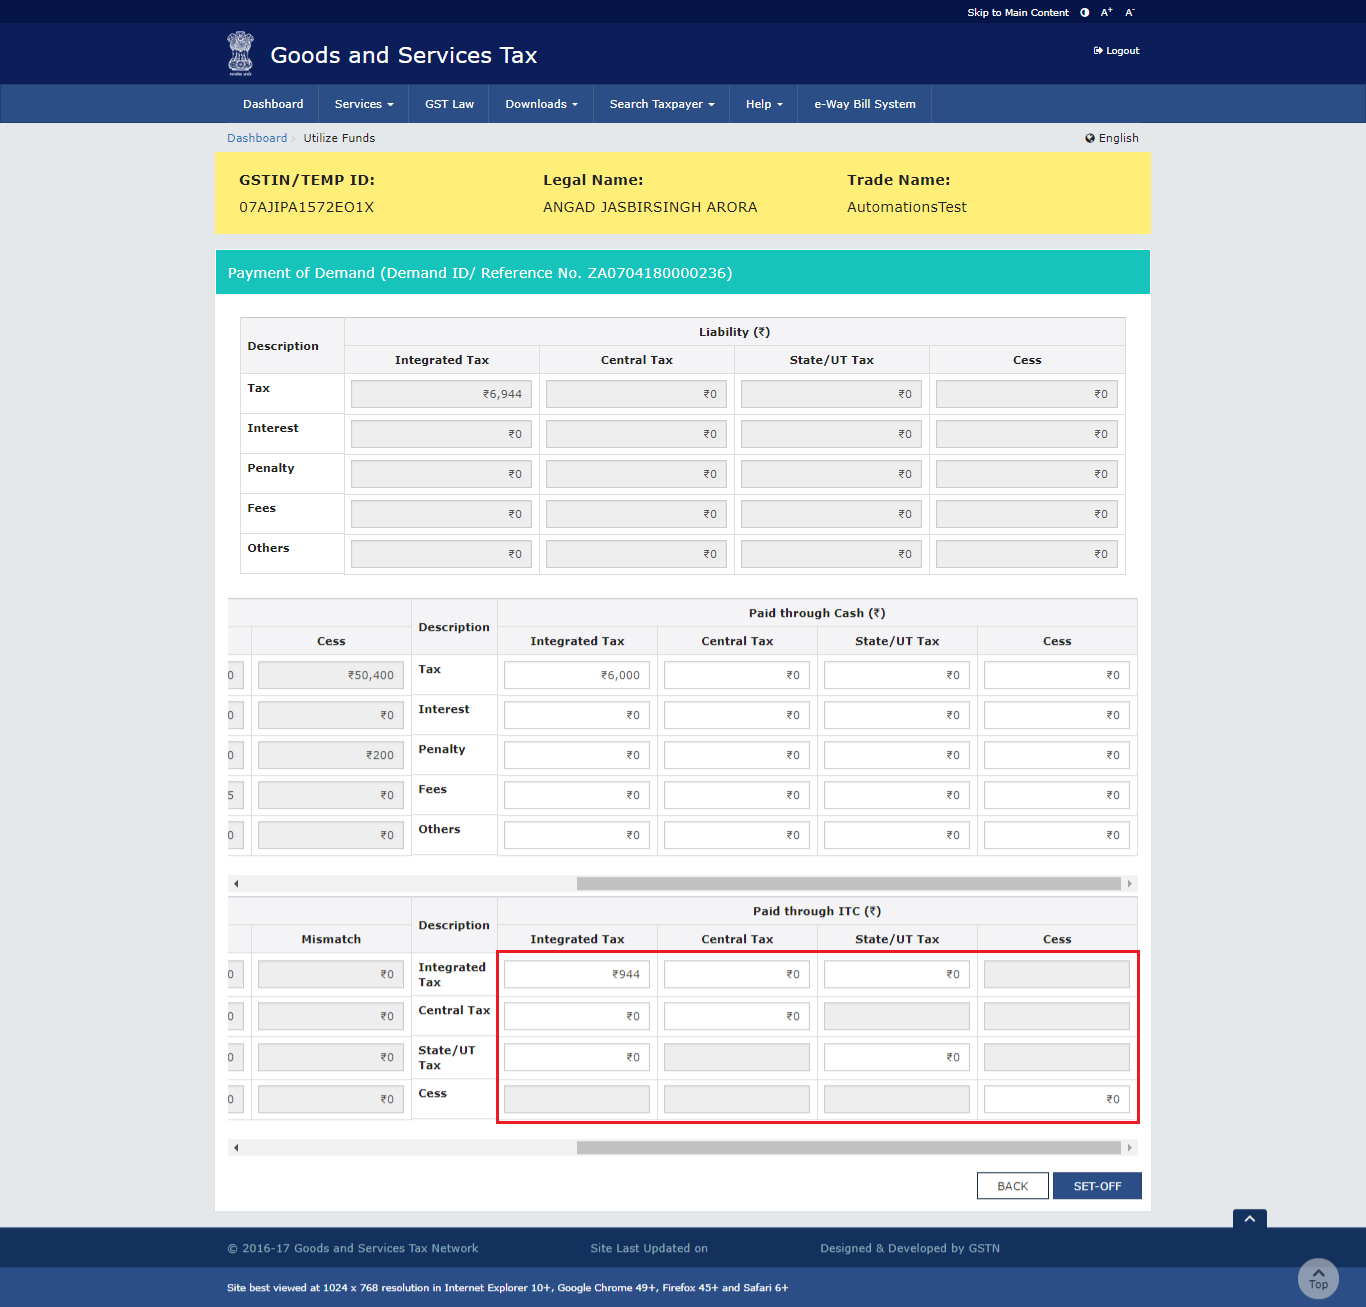
- Liability, Cash Ledger Balance and Credit Ledger Balance details are displayed.

- (a) Liability
The liability as on date are shown in below table.
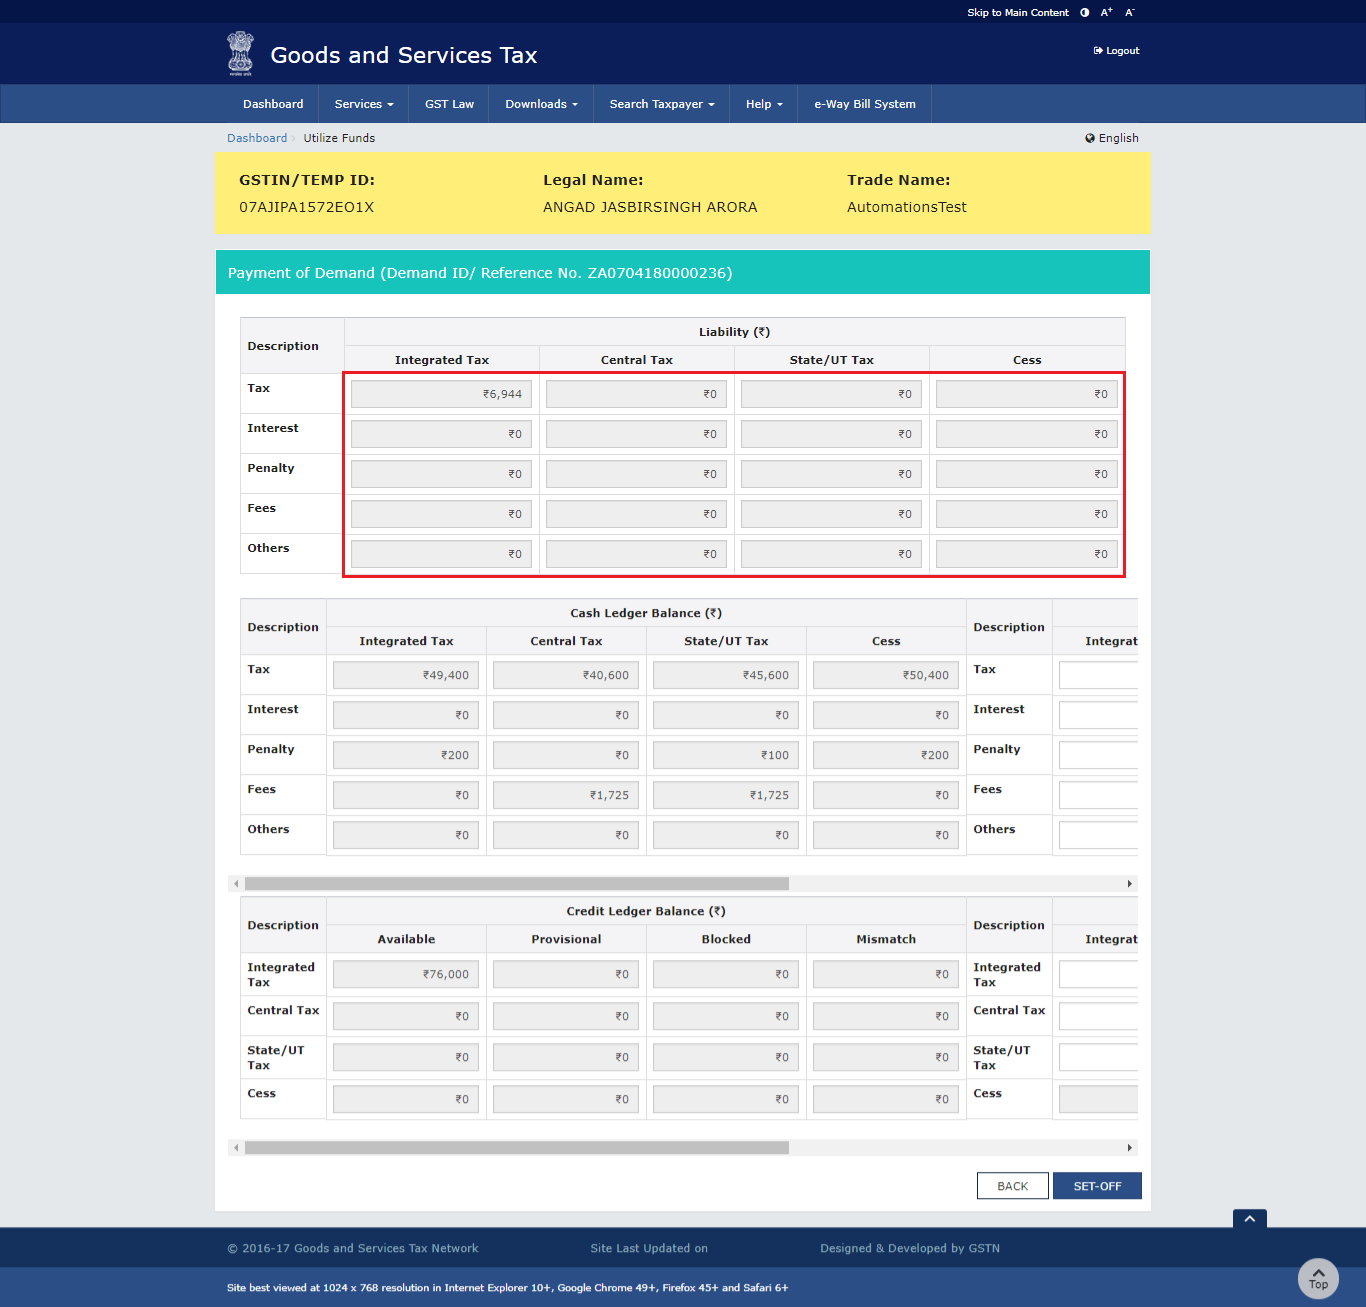
- (b) Cash Ledger Balance
The cash available as on date are shown in below table.

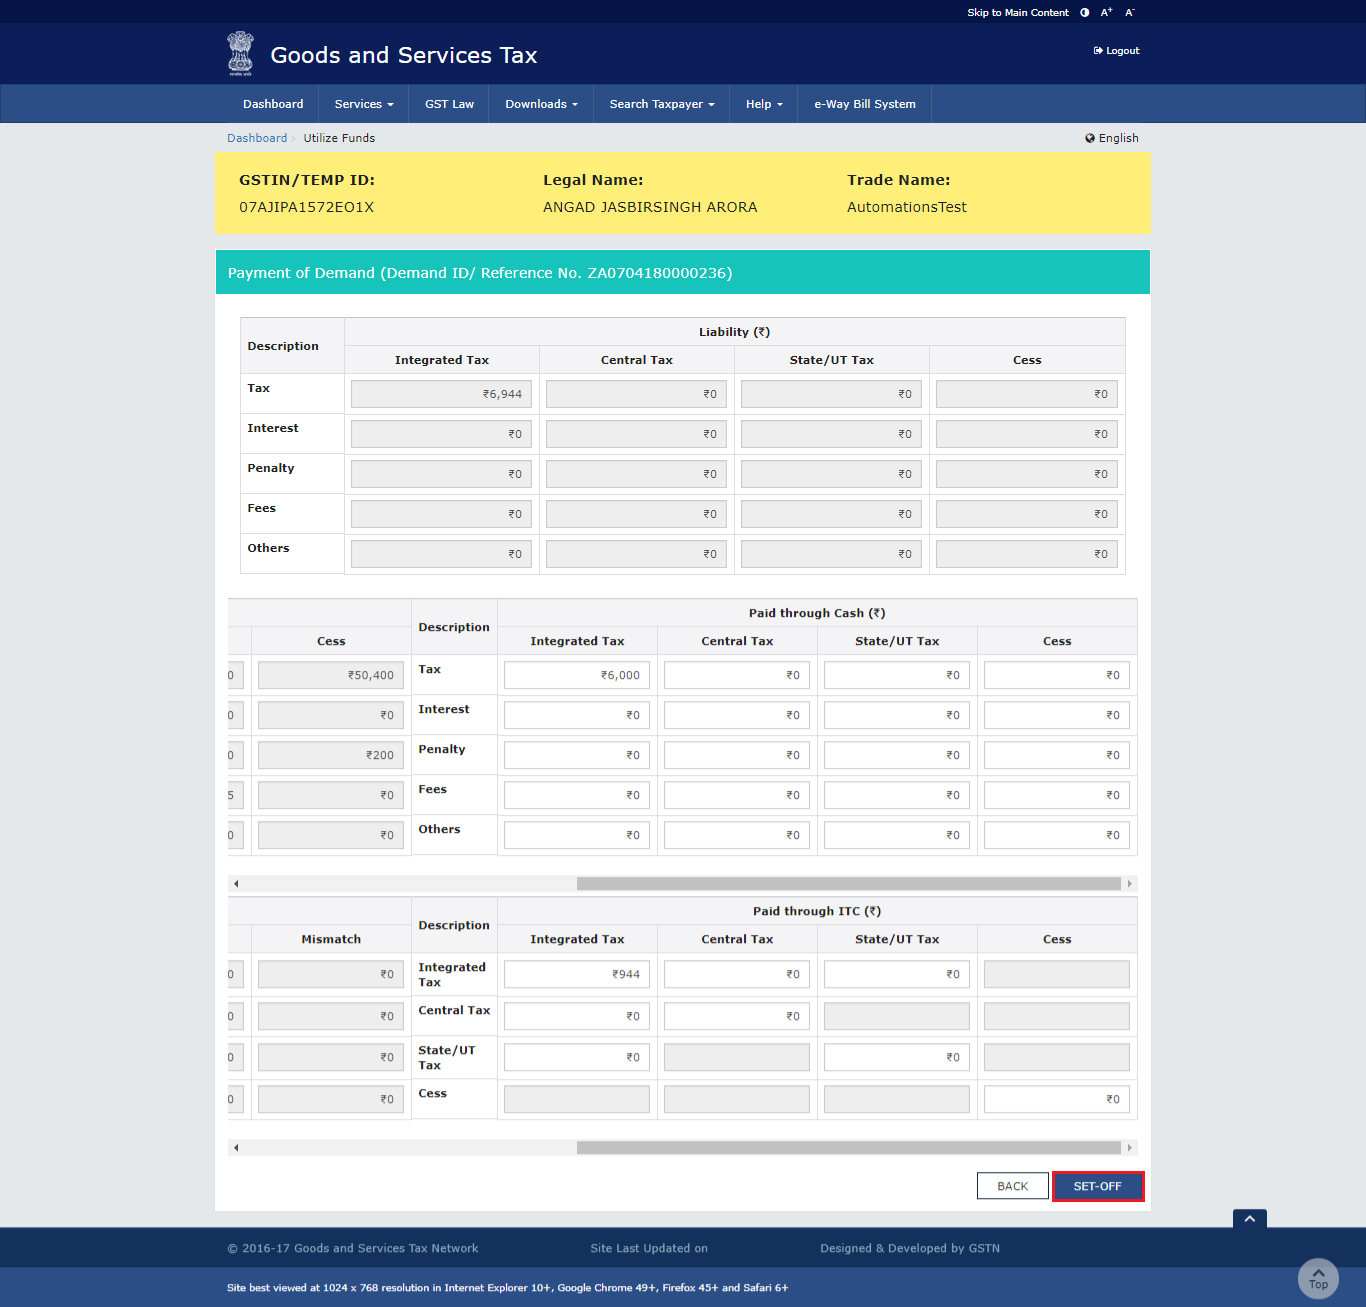
- (c) Paid through Cash
Use the scroll bar to move to the right to enter the amount to be paid through cash against that liability.
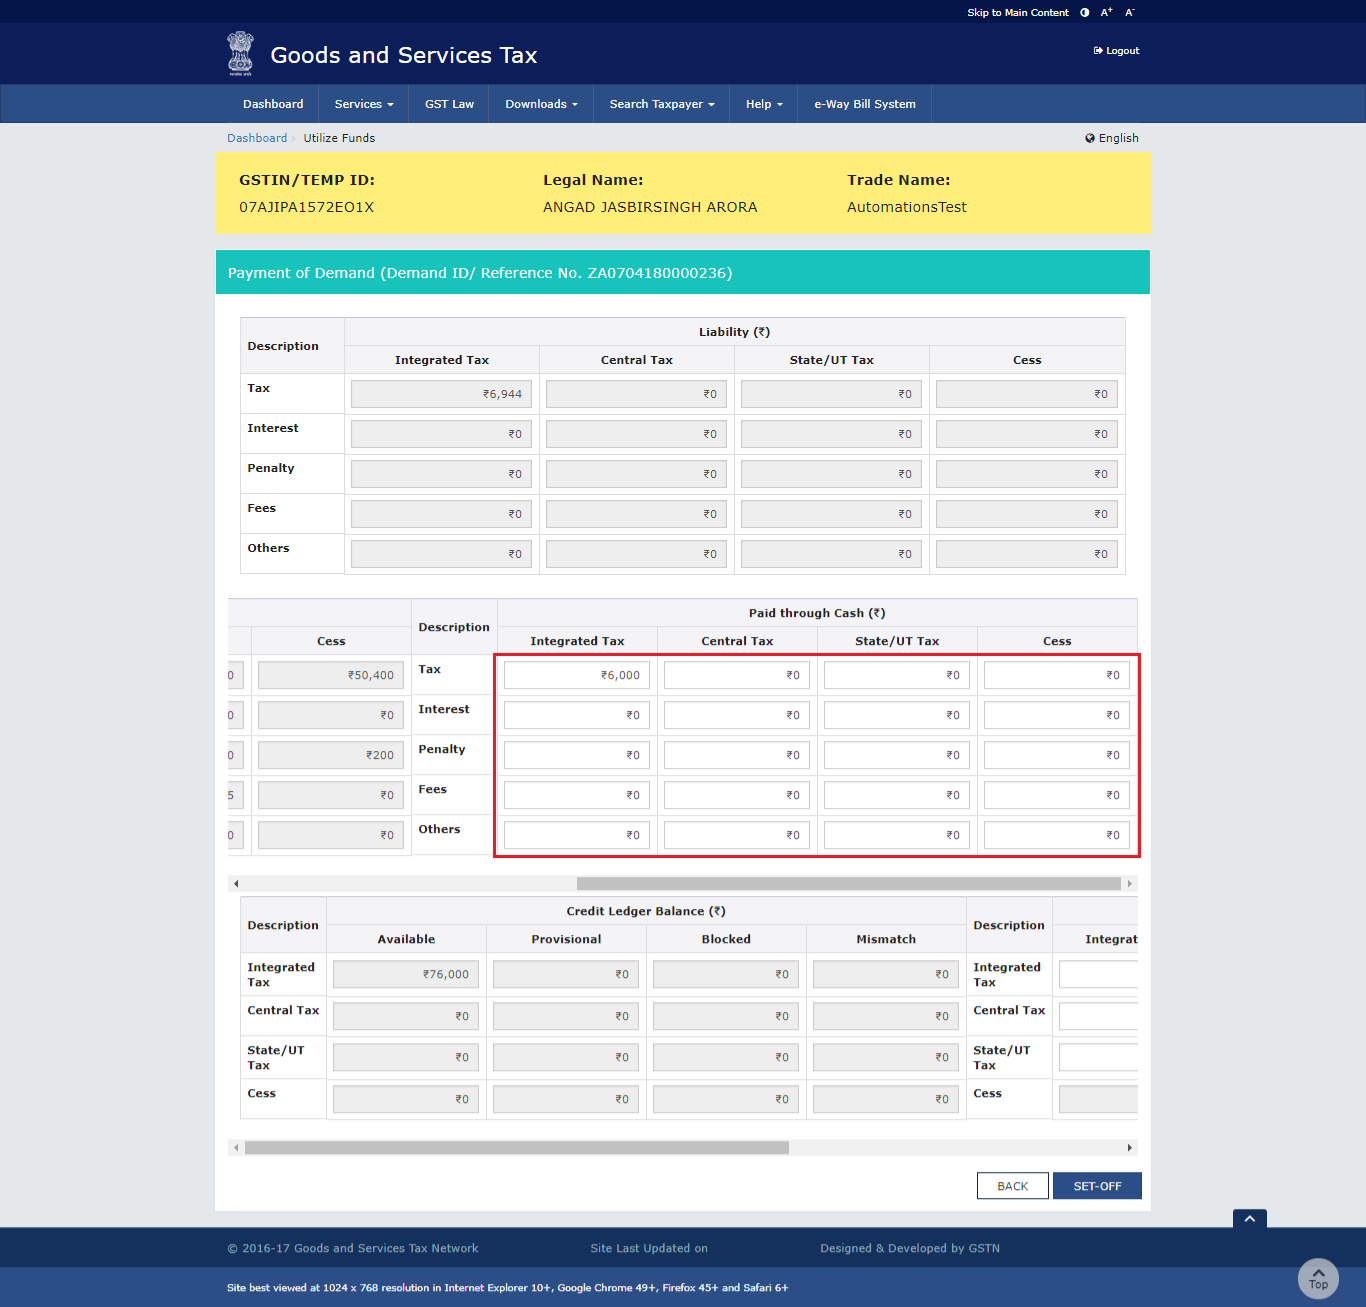
- (d) Credit Ledger Balance
The ITC available as on date are shown in below table.
- (e) Paid through ITC
Use the scroll bar to move to the right to enter the amount to be paid through ITC against that liability.
Note: ITC can be adjusted against Tax liability only.
- Once you have entered the amount, click the SET-OFF button.
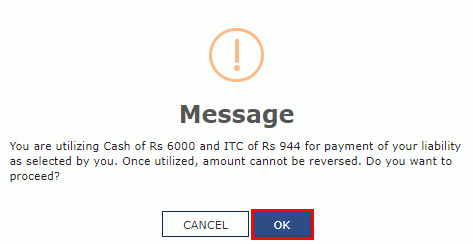
- A confirmation message is displayed. Click the OK button.
- A success message is displayed. Payment Reference Number is displayed on the screen. Click the BACK button.
F. Add any Other Supporting Document
- To upload any other supporting document, enter the document description and click the Choose File button.
Note:
Only PDF & JPEG file format is allowed.
Maximum file size for upload is 5MB.
Maximum 4 supporting documents can be attached in the application. The remaining documents can be handed over in hard copy
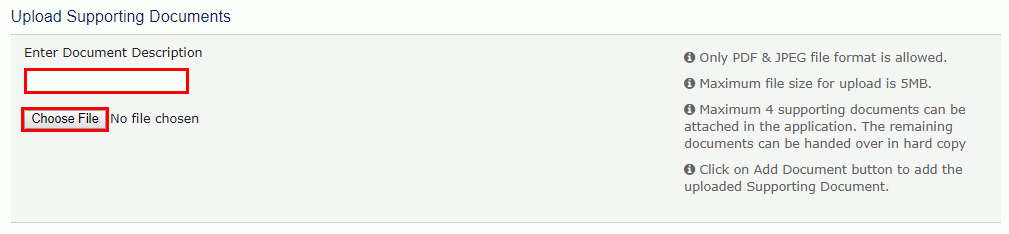
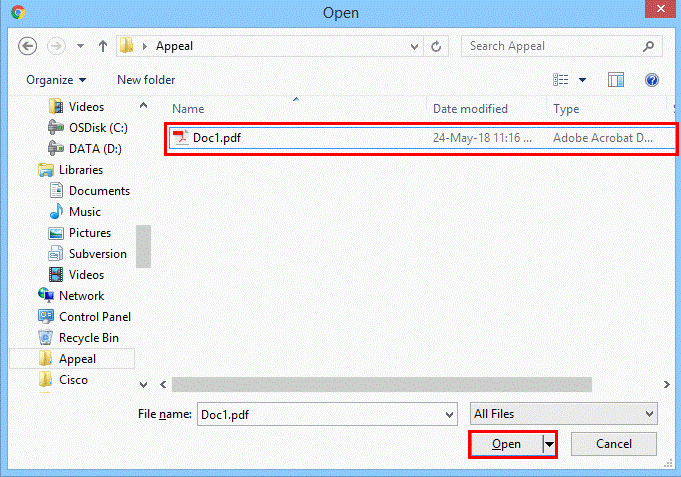
- Select the file to be uploaded and click the Open button.
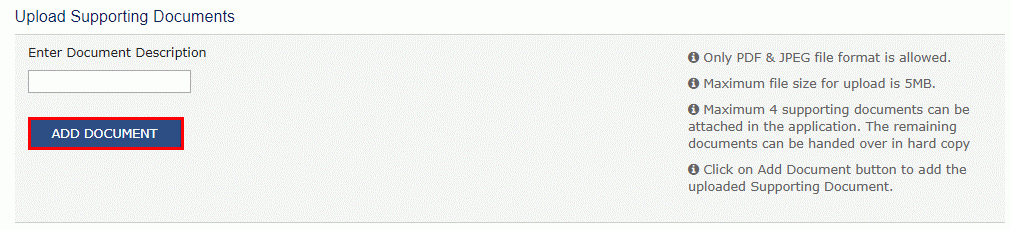
- Click the ADD DOCUMENT button to add the uploaded supporting document.
- The PDF file is uploaded. You can click the DELETE button to delete the uploaded PDF file.

G. Preview the Application and Proceed to File
- To preview the Application before filing, Click the PREVIEW button.
- The PDF file will be downloaded. Open the pdf file and check if all the details are correctly updated.
-
Select the Name of the Authorized Signatory from the drop-down list.
-
Enter the Place where application is filled.
-
Click the PROCEED TO FILE button.
- Click the PROCEED button.
- Click the SUBMIT WITH DSC or SUBMIT WITH EVC button.
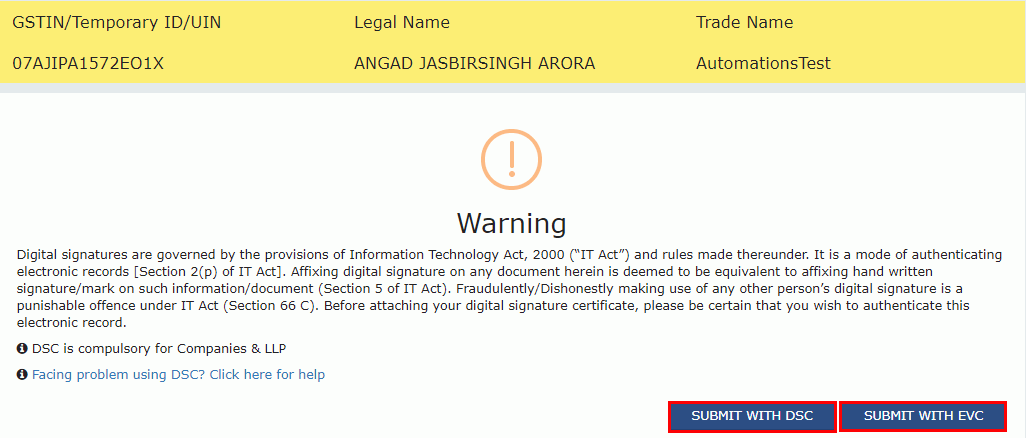
In case of SUBMIT WITH DSC
- a. Select the certificate and click the SIGN button.
In case of SUBMIT WITH EVC
- a. Enter the OTP sent on email and mobile number of the Authorized Signatory registered at the GST Portal and click the VERIFY button.
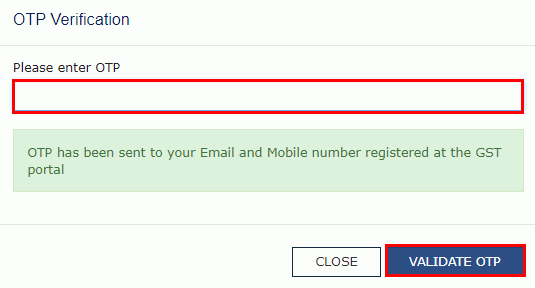
- A confirmation message is displayed that form has been signed. You can click the DOWNLOAD button to download the acknowledgement receipt.
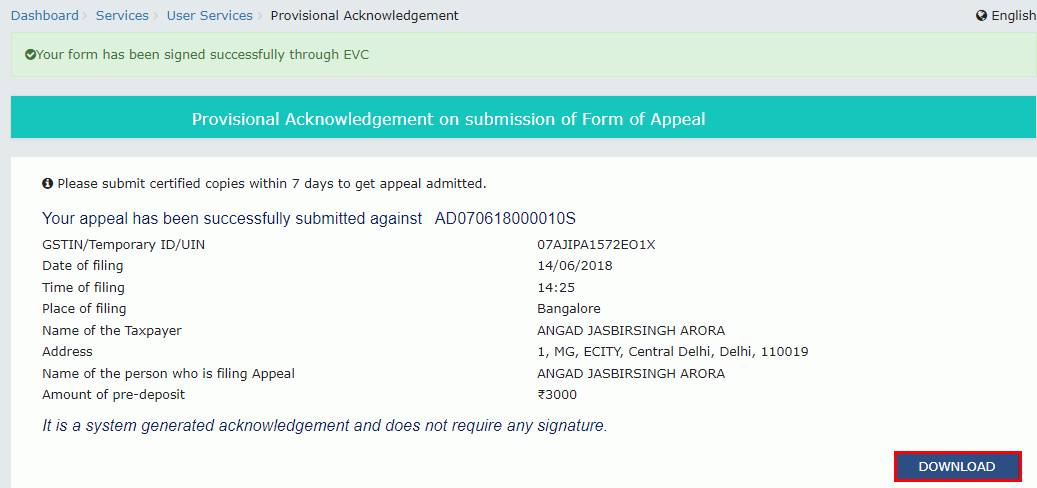
Once an appeal against a demand order is filed, an email and SMS is sent to the taxpayer (or an unregistered person, as the case may be) and Appellate Authority.