GSTR-10 Offline Tool
Overview
GSTR-10 Offline utility is an Excel-based tool to facilitate for providing the details of inputs held in stock, semi-finished or finished goods held in stock and capital goods/ plant and machinery on which input tax credit is required to be reversed by a taxpayer.
Form GSTR-10, is to be filed on the GST portal by a taxable person whose GST registration is cancelled or surrendered.
Form GSTR-10 is required to be filed by every taxpayer except:
(i) Input Service Distributor
(ii) Non-resident taxable persons
(iii) Persons required to deduct tax at source (TDS) under section 51
(iv) Persons paying tax under section 10 (Composition Taxpayer)
(v) Persons required to collect tax at source (TCS) under section 52
For more FAQs related to Online filing of GSTR-10 on the GST Portal, refer to
https://tutorial.gst.gov.in/userguide/returns/index.htm#t=FAQs_GSTR-10.htm
Downloading GSTR-10 Offline Tool and Uploading GSTR-10 details
Steps to Prepare Return in Form GSTR-10 Using Offline Utility
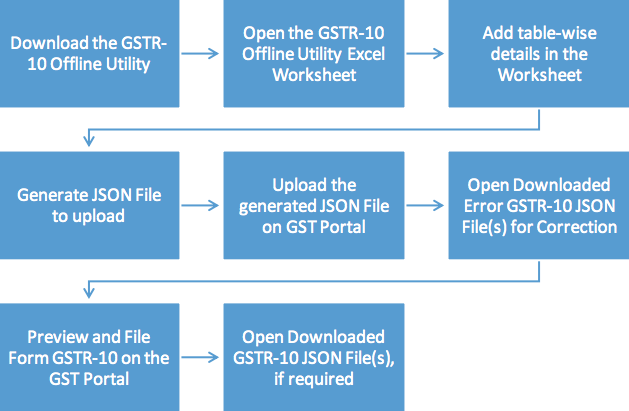
To Prepare Return in Form GSTR-10 using offline utility, perform following steps:
A. Download the GSTR-10 Offline Utility
B. Open the GSTR-10 Offline Utility Excel Worksheet
C. Add table-wise details in the Worksheet
D. Generate JSON File to upload
E. Upload the generated JSON File on GST Portal
F. Open Downloaded Error GSTR-10 JSON File(s), if any
G. Preview Form GSTR-10 on the GST Portal
H. Open Downloaded GSTR-10 JSON File(s), if required
To know about the steps of filing Form GSTR-10 on the GST Portal, please refer to following link:
https://tutorial.gst.gov.in/userguide/returns/index.htm#t=Manual_GSTR-10.htm
I. Payment of Tax
J. File Form GSTR-10 with DSC/EVC
K. Download Filed Return
A. Download the GSTR-10 Offline Utility
To download the GSTR-10 Offline Utility, perform following steps:
Downloading the GSTR-10 Offline utility is a one-time activity. However, the utility may get updated in future. So, always use the latest version available on the GST Portal.
1) Access the www.gst.gov.in URL. The GST Home page is displayed.
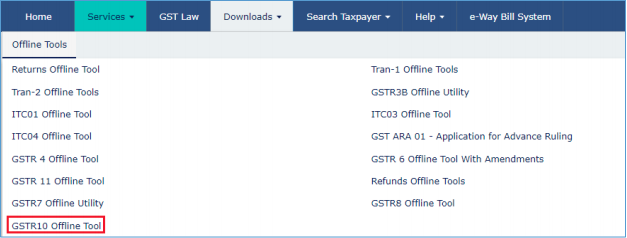
2) Click the Downloads > Offline Tools > GSTR10 Offline Tool option.
You can download the GSTR-10 Offline Utility from the Portal without logging in to the GST Portal.
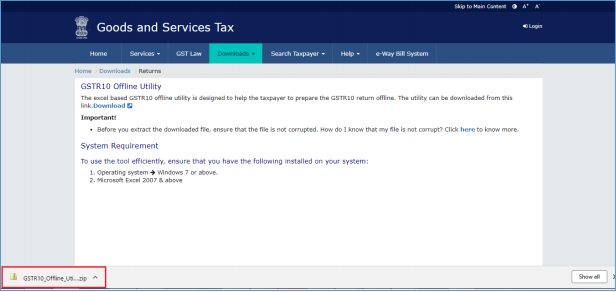
3) Returns page is displayed. Click the Download hyperlink.
Make sure, you carefully read the Important message and System Requirement details displayed on the page.
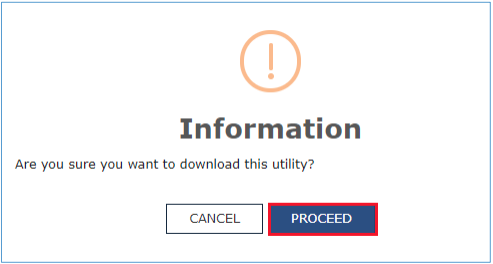
4) An Information popup opens. Click PROCEED.
5) Returns page is displayed again and a zipped GSTR10 Offline Utility folder gets downloaded.
B. Open the GSTR-10 Offline Utility Excel Worksheet
To open the downloaded GSTR-10 Offline Utility Excel Worksheet, perform following steps:
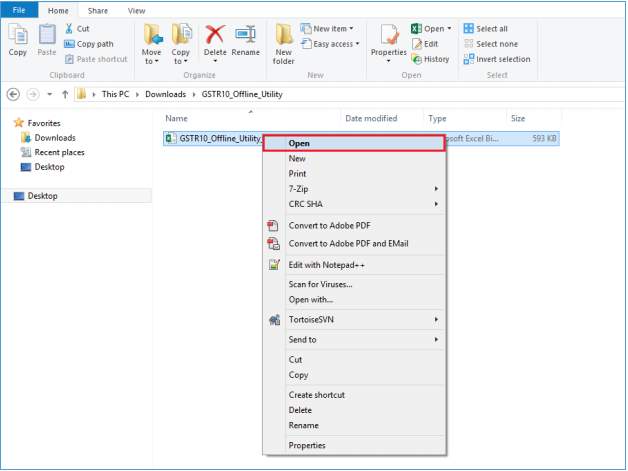
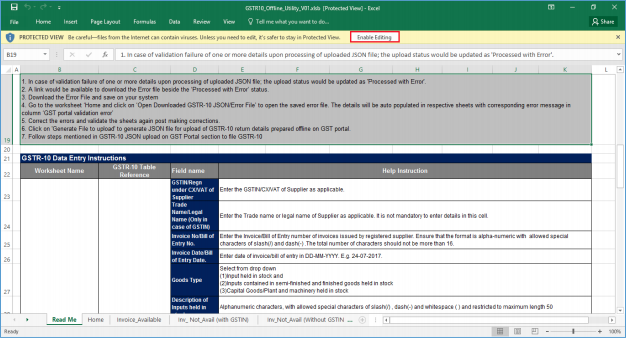
1) Extract the files from the downloaded zipped folder GSTR10_Offline_Utility.zip and you will see GSTR10_Offline_Utilityexcel file in the unzipped folder. Right-click and click Open.
2) Click Enable Editing.
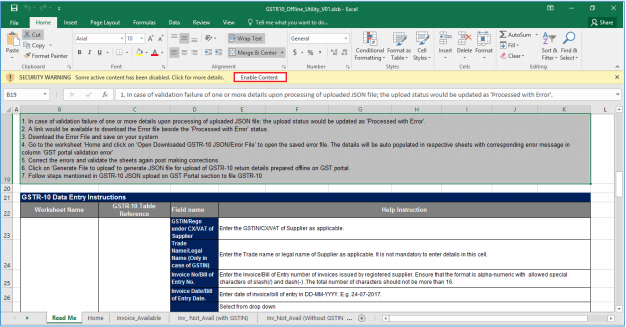
3) Click Enable Content and then click on the Read Me tab.
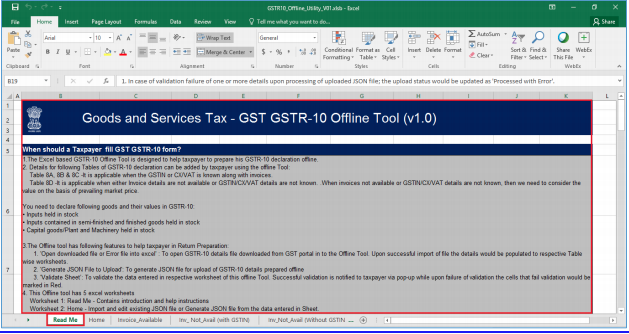
The Worksheet comprises 5 tabs:
-
Read Me: The Read Me sheet contains Introduction and help instructions for you to read and use them to easily fill data in GSTR-10 Offline Utility.
-
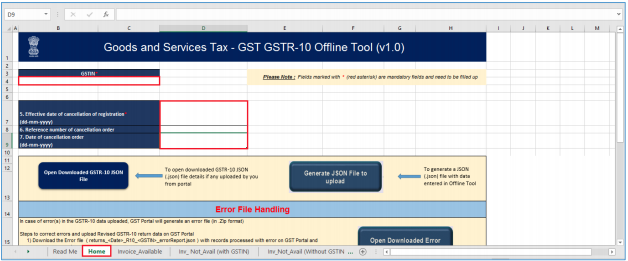
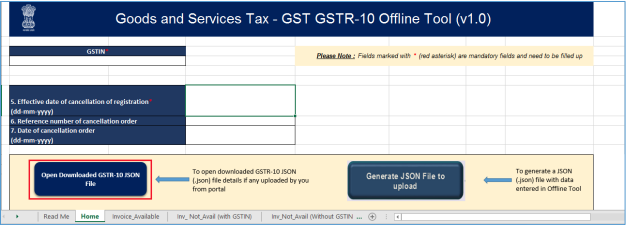
Home: The Home sheet is the main page of the utility where you need to enter GSTIN, Effective Date of Cancellation of Registration etc.
-
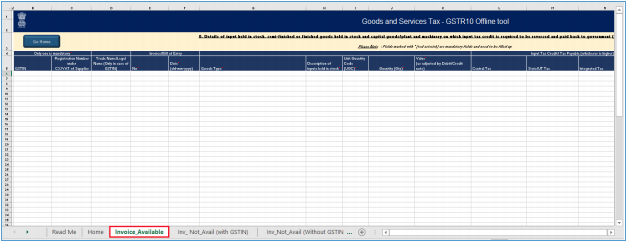
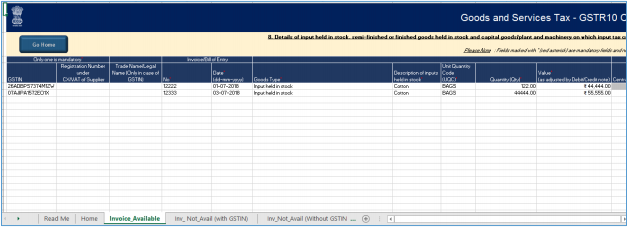
Invoice_Available: In Invoice_Available sheet, you need to enter details of inputs held in stock, semi-finished or finished goods held in stock and capital goods/ plant and machinery on which input tax credit is required to be reversed where invoices of supplier are available.
-
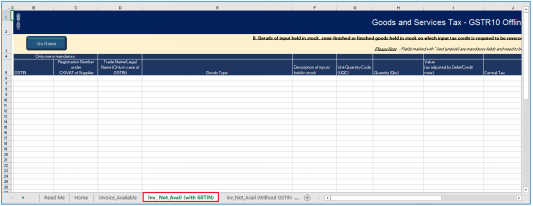
Inv_Not_Avail (with GSTIN): In Inv_Not_Avail (with GSTIN) sheet, you need to enter details of input held in stock or inputs as contained in semi-finished or finished goods held in stock on which input tax credit is required to be reversed where invoices of supplier are not available.
-
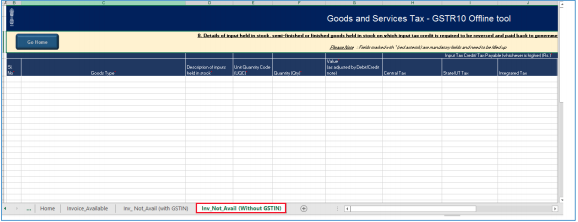
Inv_Not_Avail (without GSTIN): In Inv_Not_Avail (without GSTIN) sheet, you need to enter details of input held in stock or inputs as contained in semi-finished or finished goods held in stock on which input tax credit is required to be reversed where invoices and GSTNIN/CX/VAT details of supplier are not available.
4) Read Me page is displayed. It contains introduction and help instructions. Scroll down to read all the instructions carefully. Once you have completed your reading, you can now proceed to enter details in the worksheet.
C. Add table-wise details in the Worksheet
To add table-wise details in the Worksheet, perform following steps:
1) Go to the Home tab and enter GSTIN, Effective date of cancellation of registration (in ddmm-yyyy format), Reference number of cancellation order and Date of Cancellation Order Tax Period (in dd-mm-yyyy format).
2) Go to the Invoice_Available tab and enter details of inputs held in stock, semi-finished or finished goods held in stock and capital goods/ plant and machinery on which input tax credit is required to be reversed, where corresponding invoices are available.
a. In Column GSTIN or Registration Number under CX/VAT of Supplier, enter the GSTIN/CX/VAT of supplier as applicable.
b. In Column Trade Name/Legal name, enter the Trade name or Legal name of supplier as applicable. It is not mandatory to enter details in this cell.
c. In Column Invoice/Bill of Entry No., enter the Invoice/Bill of Entry number of invoices issued by registered supplier.
Note: Ensure that the format is alpha-numeric with allowed special characters of slash (/) and dash (-). The total number of characters should not be more than 16.
d. In Column Invoice/Bill of Entry Date, enter date of invoice/bill of entry in DD-MM-YYYY.
E.g. 24-07-2017.
e. Select Goods Type from the drop-down list.
f. In Column Description of Inputs held in stock, enter description of inputs held in stock.
Note: You can enter alphanumeric characters, with allowed special characters of slash (/),
dash (-) and whitespace ( ) and restricted to maximum length 50.
g. Select UQC from the drop-down list.
h. In Column Quantity, enter the quantity held in stock.
Note: You can enter 13 number before decimal and 2 decimal places.
i. In Column Value (As adjusted by debit note/credit note), enter the total value indicated in the invoice of the received goods or services along with 2 decimal digits.
j. In Column Amount of ITC/Tax payable (Rs.), enter the amount of ITC or tax payable in Rs.
Note: Data to be entered depends upon the State code of taxpayer GSTIN and State code of supplier’s GSTIN.
a. In case of same State code of taxpayer and supplier (you need to enter either of IGST or CGST and SGST/UTGST) and in case of different State code of taxpayer and supplier (you need to enter only IGST).
i. CGST and SGST amount should be same
ii. Amount of ITC claimed should be less than or equal to Value
b. In case of CX/VAT – CGST and SGST amounts are required to be provided.
k. In Column Cess, enter the total Cess amount claimed.
l. In Column Action, select whether you want to add or delete that invoice detail in database. If you select “Add”, GST Portal will treat invoice from that row as new data and will add in database. All new entries will be added as new entries.
In case, some details exist from previous upload, it will be updated with latest uploaded details.
If you select “Delete”, invoice from that row will be deleted from database after upload.
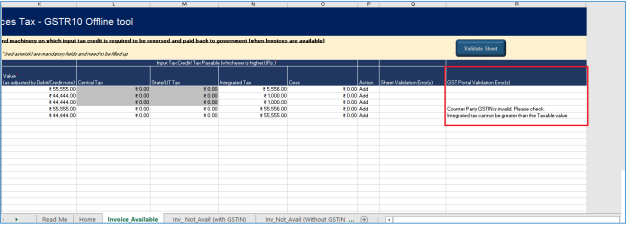
L. In Column GST Portal validation error(s), after downloading and importing the error report from GST portal, cell from this column will shows error message and corresponding to that row detail. You can use filter, to filter error(s). After correction, you can re-upload the updated details.
3) Click the Validate Sheet button.
4) 4. Sheet is validated.
4a. In case of No error:
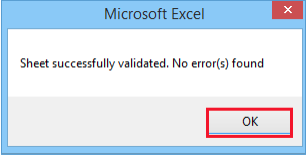
i. No Errors popup appears. Click OK.
4b. In case of error:
i. In Column Sheet validation Error(s), if any row has some error after validation, the erroneous cell from that row becomes red.
ii. Please check the cell with red color in corresponding row to view the error message.
iii. Rectify the error and click Validate Sheet button again to see that there is no error. Move to the next sheet now.
5) Go to the Inv_Not_Avail (With GSTIN) tab and enter details (in same manner as explained above) of inputs held in stock or inputs as contained in semi-finished or finished goods held in stock on which input tax credit is required to be reversed, where invoices are NOT available, but GSTIN/CX/VAT of supplier is available.
In this sheet, invoice number and invoice date columns are not there.
6) Go to the Inv_Not_Avail (Without GSTIN) tab and enter details (in same manner as explained above) of inputs held in stock or inputs as contained in semi-finished or finished goods held in stock, on which input tax credit is required to be reversed, where invoices are NOT available but GSTIN/CX/VAT of supplier is not available.
In this sheet, Sl. no is mandatory.
D. Generate JSON File to upload
To generate JSON File to upload, perform following steps:
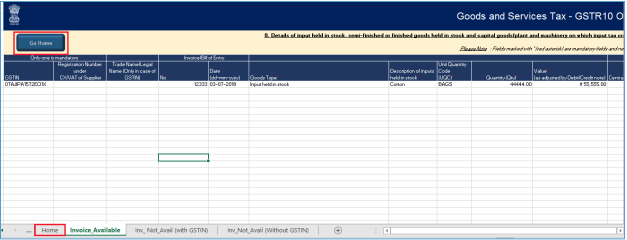
1) From the tab you are on, go to the ‘Home’ sheet by either clicking the ‘Go Home’ button or clicking the Home sheet.
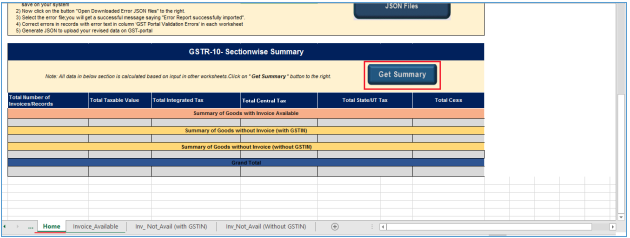
2) On the Home sheet, scroll down and click on the Get Summary button.
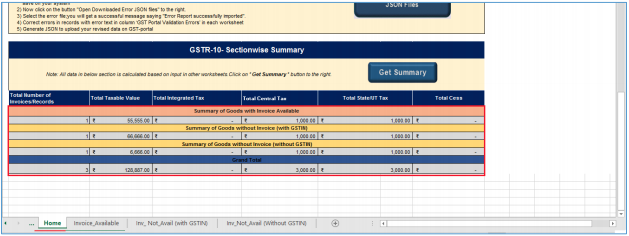
3) Summary of all the entries filled up in sheets are displayed.
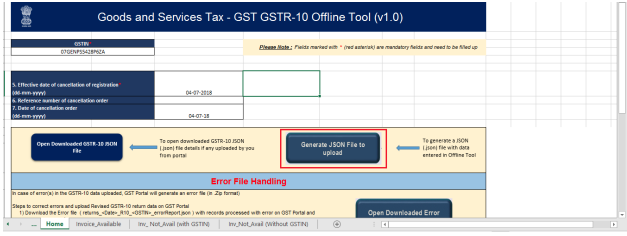
4) Scroll up and click the Generate JSON File to upload button.
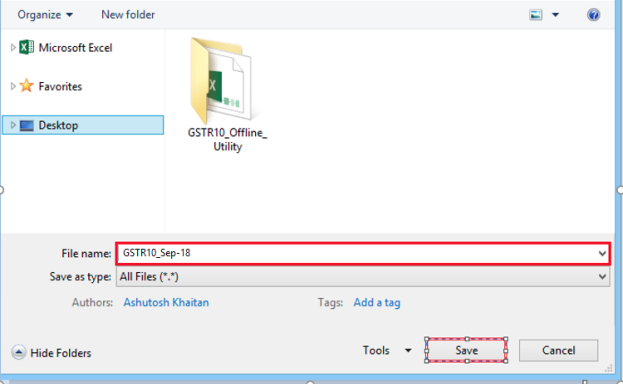
5) A Save As pop-up window appears. Select the location where you want to save the JSON file, enter the file name and click the SAVE button.
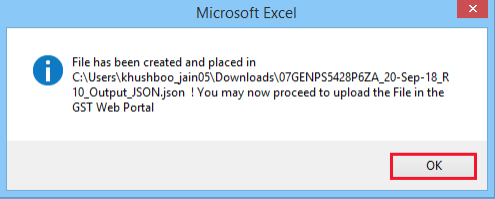
6) A window pop-up appears with a message that the file has been generated and placed at the desired location and now it can be uploaded on the portal. Click OK.
E. Upload the generated JSON File on GST Portal
To upload the generated JSON File on the GST Portal, perform following steps:
1) Access the www.gst.gov.in URL. The GST Home page is displayed.
2) Login to the portal with valid credentials.
3) Dashboard page is displayed. Click Services > Returns > Final Return option.
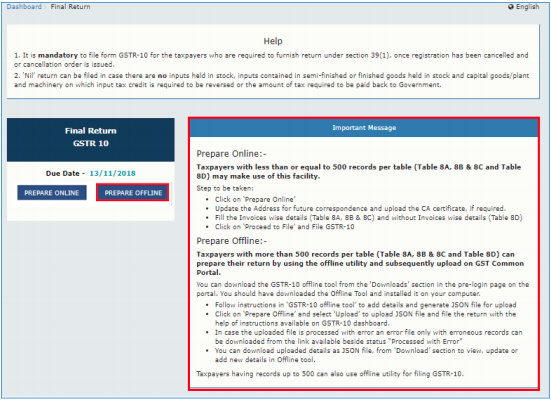
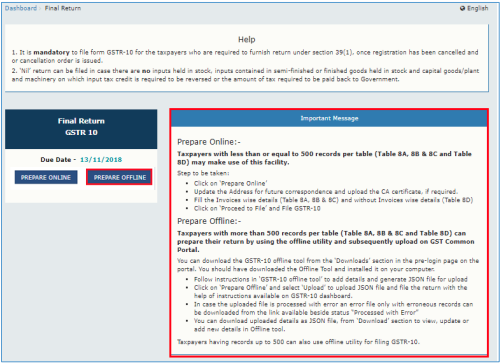
4) The GSTR-10 tile is displayed, with an Important Message box on the right. Please read the important message in the box carefully. In the GSTR-10 tile, click the PREPARE OFFLINE button.
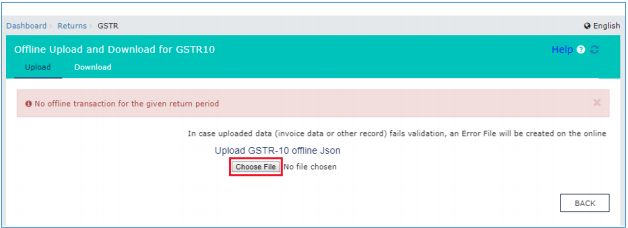
5) The Upload section of the Offline Upload and Download for GSTR-10 page is displayed. Click the Choose File button.
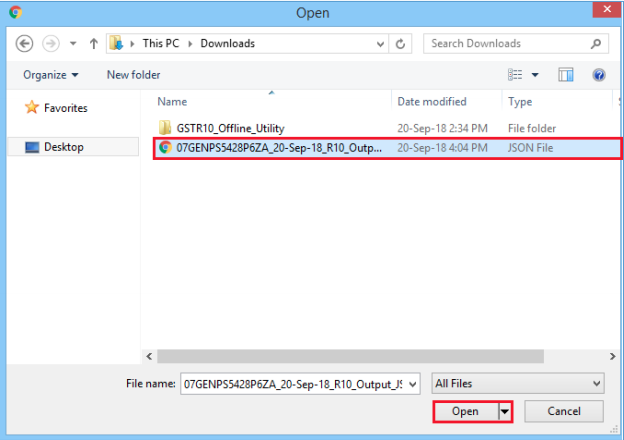
6) Browse and navigate the JSON file to be uploaded from your computer. Click the Open button.
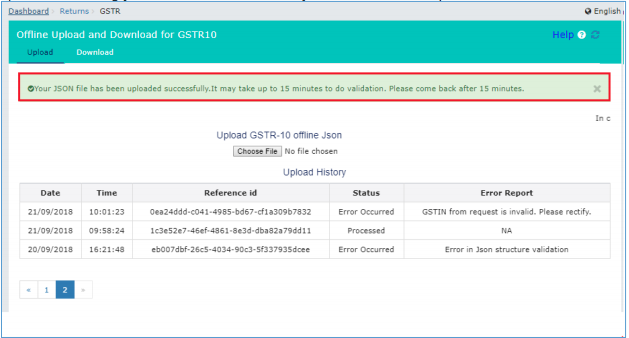
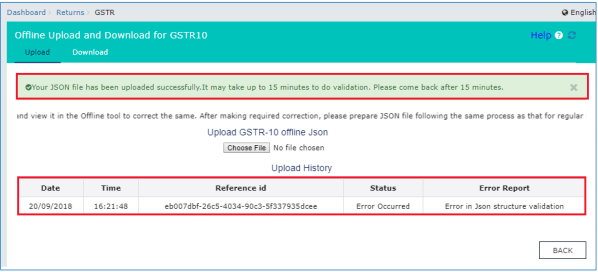
7) The Upload section page is displayed. A green message appears confirming successful upload and asking you to wait while the GST system validates the uploaded data.
8) Once the validation is complete, one of the following two instances can occur:
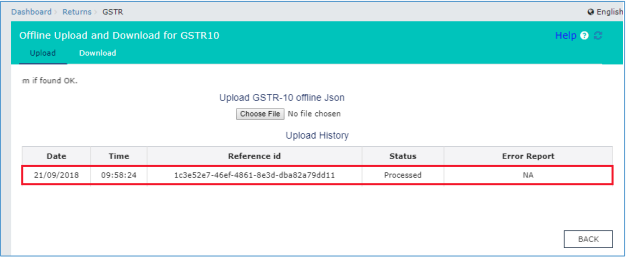
8a. No error was found. Then, the Upload History table will show the Status as “Processed” and Error Report as “NA”.
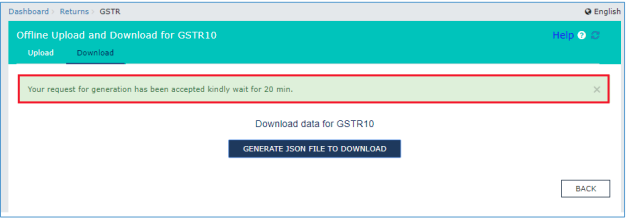
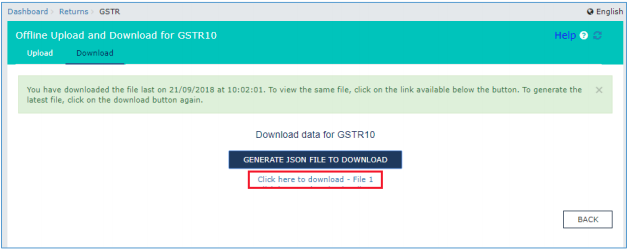
i. You can download the successfully uploaded file under ‘Download’ section. Go to Download section and click the GENERATE JSON FILE TO DOWNLOAD button.
ii. A green message is displayed confirming your request and asking you to wait for 20 minutes.
While you wait for the file to be generated, you can preview the successfully uploaded details in Form GSTR-10 on the GST portal.
iii. After 20 minutes, a link is displayed. Click on the link to download your validated zipped file. Unzip and save the Json File in your machine.
v. Import the json file into the offline utility and make updates as necessary.
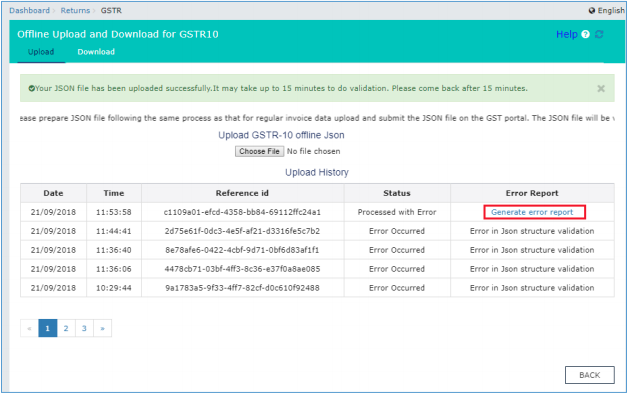
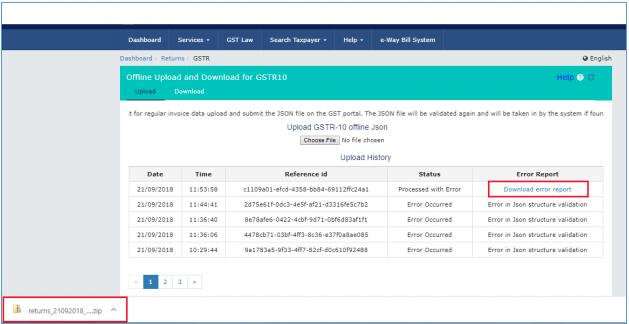
8b. Error was found. Then, the Upload History table will show the Status as “Error Occurred”.
Error Report will contain only those entries that failed validation on the GST portal. The successfully-validated entries can be previewed online.
i. Click Generate error report hyperlink. It might take 15 minutes to do the validation. You can come back after 15 minutes to check for same.
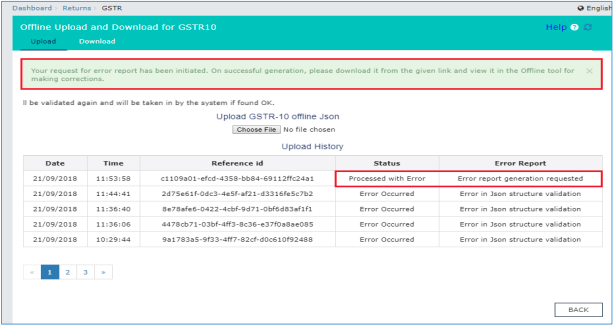
ii. A confirmation-message is displayed and Columns Status and Error Report change as shown.
iii. Once the error report is generated, Download error report link is displayed in the Column Error Report. Click the Download error report link to download the zipped error report.
iv. Unzip and save the Json File in your machine.
v. Import the json file into the offline utility and make updates as necessary.
F. Open Downloaded Error GSTR-10 JSON File(s), if any
To open the downloaded Error GSTR-10 JSON File, perform following steps:
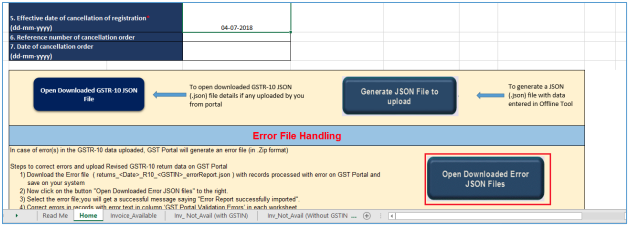
1) Open GSTR-10 Offline Utility and go to the Home tab. Under the section Error File Handling, click the Open Downloaded Error JSON Files button.
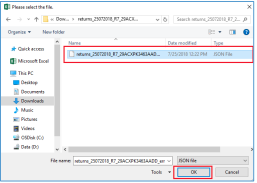
2) A file dialog box will open. Navigate to extracted error file. Select the file and click the OK button.
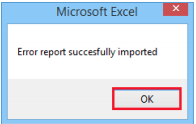
3) Success message will be displayed. Click the OK button to proceed
4) Navigate to Invoice available / Not available sheets. Correct the errors, as mentioned in the column “GST Portal Validation Errors” in each sheet.
The downloaded Error JSON File contains only the erroneous entries.
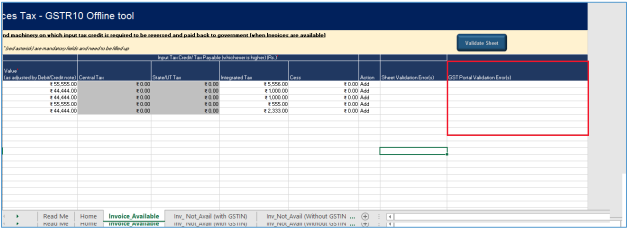
5) After making the corrections, click the Validate Sheet button to validate the sheets. Now, column “GST Portal Validation Errors” and the column “Sheet Validation Errors” should be empty.
6) From the tab you are on, go to the Home tab by either clicking the Go Home button or clicking the Home tab to generate summary.
G. Preview Form GSTR-10 on the GST Portal
To preview Form GSTR-10 on the GST Portal, perform following steps:
1) Access the www.gst.gov.in URL. The GST Home page is displayed.
2) Login to the portal with valid credentials.
3) Dashboard page is displayed. Click Services > Returns > Final Return option.
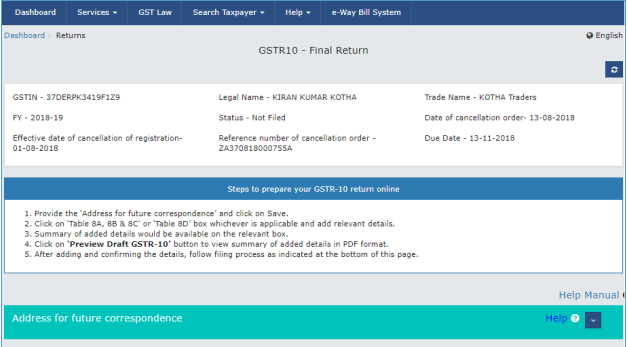
4) The GSTR-10 tile is displayed, with an Important Message box on the right. In the GSTR-10 tile, click the PREPARE ONLINE button.
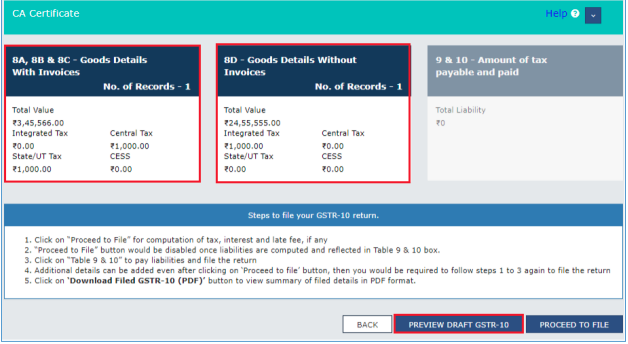
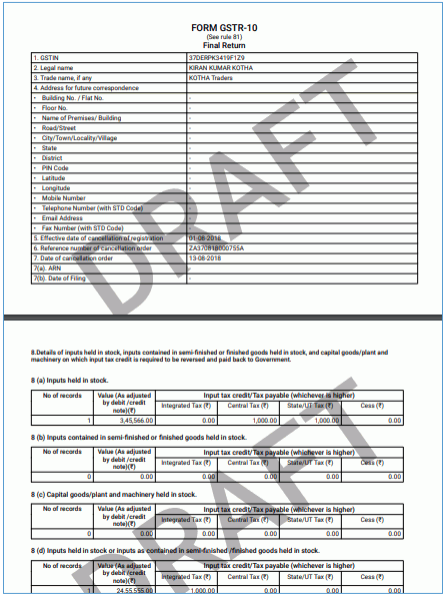
The details you had successfully uploaded on the portal using the Offline Utility would be displayed in Tiles 8A, 8B & 8C and 8D. Click the PREVIEW DRAFT GSTR-10 button. The draft Summary page of your Form GSTR-10 gets downloaded.
5) The downloaded PDF is displayed. It is recommended that you review the summary of entries made in different sections carefully before filing. The PDF file generated would bear watermark of draft as Form GSTR-10 is yet to be Filed.
6) For knowing how to proceed to file and file the GSTR 10 Return online, please follow the steps mentioned in the following hyperlink:
https://tutorial.gst.gov.in/userguide/returns/index.htm#t=Manual_GSTR-10.htm
H. Open Downloaded GSTR-10 JSON File(s), if required
To open the downloaded GSTR-10 JSON File to view the invoices in the return, perform following steps:
1) Open GSTR-10 Offline Utility and go to the Home tab. Click the Open Downloaded GSTR10 JSON File button.
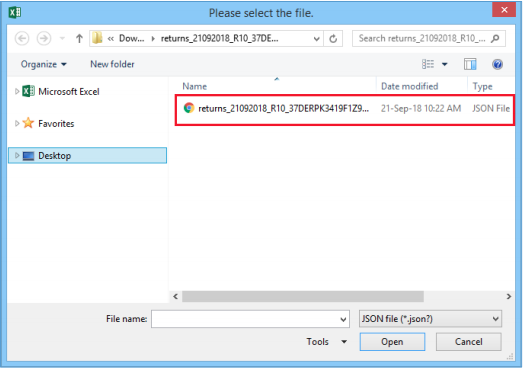
2) Browse the JSON (.json) file.
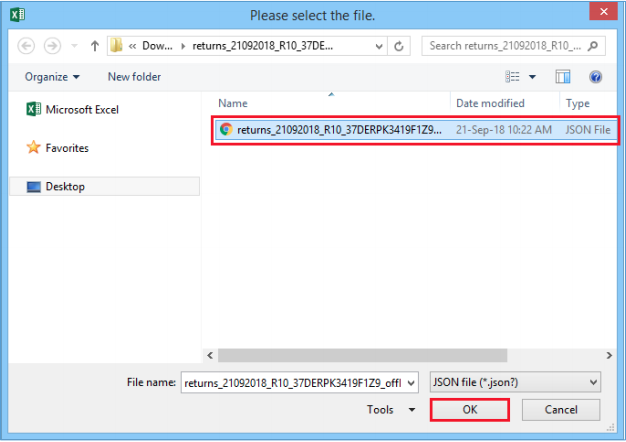
3) Select the JSON file and click the Ok button.
4) Success message will be displayed. Click the OK button to proceed.
5) Now all the entries that were successfully uploaded on the GST Portal would be autopopulated in the respective sheets.
6) Modify the details as per requirement in Invoice_Available, Inv_Not_Avail (with GSTIN) and Inv_Not_Avail (without GSTIN) sheets.
7) After making the modifications, click the Validate Sheet button to validate the sheets.
8) After each section is successfully validated, click the Get Summary button to update the summary on Home tab.
9) Summary is displayed for all the sections.
GST portal allows you to modify and upload JSON multiple times before it is filed.
