GSTR-11 Offline Tool
An Overview
The GSTR-11 Offline Tool is provided to enable registered persons assigned with Unique Identification Number to file GSTR-11. Filing GSTR-11 before filing GST RFD-10 enables the UIN holder to claim refund of taxes paid on inward supplies. The jurisdictional Tax Official may also require the UIN holder to file GSTR11 at any time. Invoice level details of inward supplies need to be filed in GSTR-11.
To facilitate the furnishing of records in short-time an easy to use excel offline tool has been made available for preparation of GSTR-11 statement in download section of GST portal. All the details can be added in offline mode and later uploaded on GST portal to furnish the GSTR-11.
Downloading the GSTR-11 Offline Tool
Downloading the GSTR-11 Offline tool is a one-time activity, however, it may require an update in future if the Tool is updated at the GST Portal. Please check the version of the offline tool used by you with the one available for download on the GST Portal at regular intervals.
To download and install the GSTR-11 Offline Tool to prepare the GSTR-11 return offline, perform the following steps:
You can download the GSTR-11 Offline Tool from the Portal without login to the GST Portal.
1) Access the https://www.gst.gov.in/ URL.
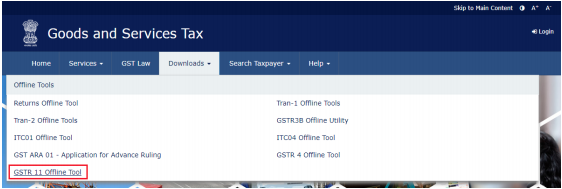
2) The GST Home page is displayed. Click the Downloads > Offline tools > GSTR 11 Offline Tool.
The download of the GSTR 11 Offline Tool usually takes 2-3 minutes to download depending on the Internet speed.
3) Browse and select the location where you want to save the downloaded files.
In some machines, depending on your browser settings, the files are downloaded in the folder Downloads on your machine.
Installation of the GSTR-11 Offline Tool
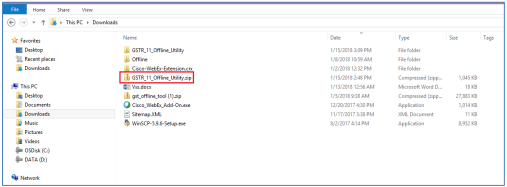
Once the download of the GSTR-11 Offline Tool is complete, you need to unzip these downloaded files on your machine.
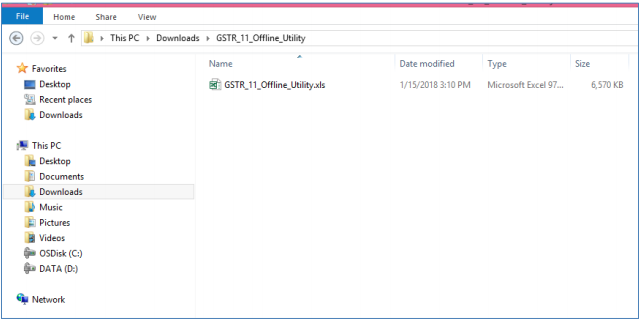
1) Unzip the downloaded files and extract the files from the downloaded zip folder GSTR_11_Offline_Utility.zip. Zip folder consists of the GSTR_11_Offline_Utility.xls excel file, as shown in the screenshot below.
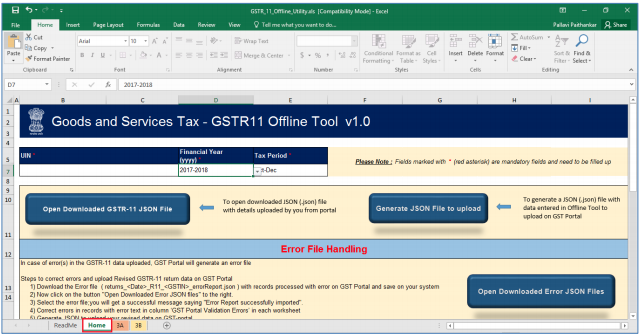
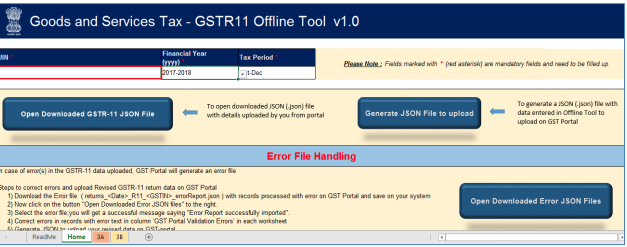
2) Double click the GSTR 11 Offline_Utility.xls file. This Excel workbook template has 4 worksheets:
1) Read Me – Contains Introduction and help instructions
2) Home –
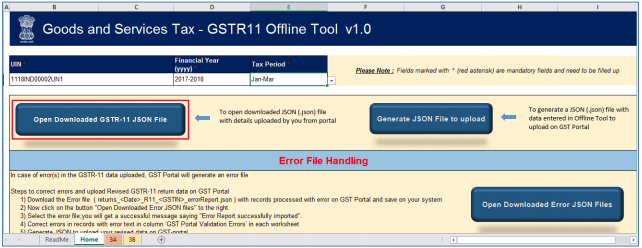
Open downloaded GSTR-11 JSON File: To Open downloaded JSON (.json) file with details uploaded by you from Portal.
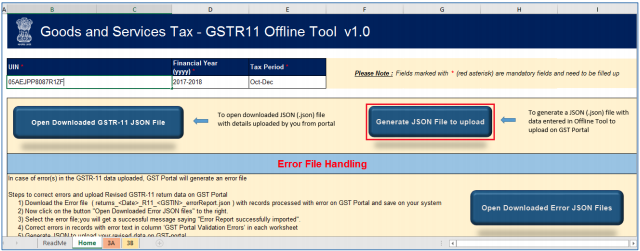
Generate JSON file to upload: Generate JSON file with data entered in Offline Tool to upload on GST Portal.
Open Downloaded Error JSON Files: To Open Downloaded Error file in JSON format in case of error(s) in GSTR-11 JSON File.
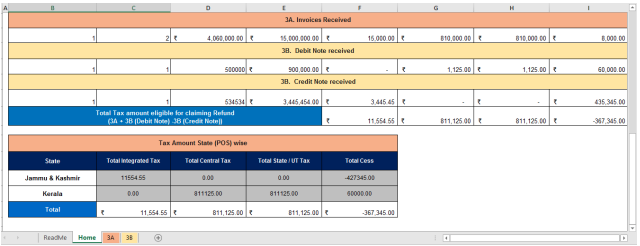
Get Summary: Summary is calculated based on input in worksheets 3A and 3B.
3) 3A – To update the detail of invoices received
4) 3B – To update the details of Debit/Credit Note received.
Prepare GSTR-11 Return
Let us take an example where you need to prepare the GSTR-11 on the GST Portal using the GSTR-11 Offline Tool. To prepare the GSTR-11 Return, you need to perform the following steps:
1) Enter details in the 3A/3B worksheet of GSTR-11 Offline Tool.
2) Generate JSON file using ‘Generate JSON File to Upload’ button
3) Upload the generated JSON on GST Portal. Preview the details uploaded, submit, sign and File return on the GST portal
1. Enter details in the worksheet of GSTR-11 Offline Tool
Please ensure that you download the latest version of GSTR-11 Offline Tool from the GST portal. https://www.gst.gov.in/download/returns
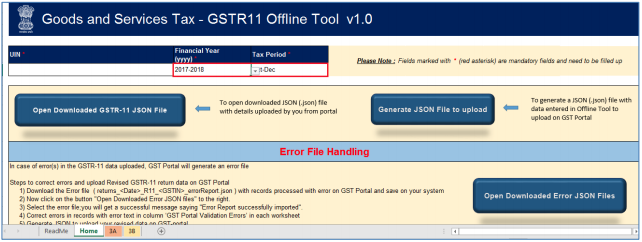
1) Launch the GSTR-11 Excel based Offline Tool and navigate to worksheet Home.
2) In the UIN field, enter the UIN.
3) Select the Financial year and Tax Period drop-down list.
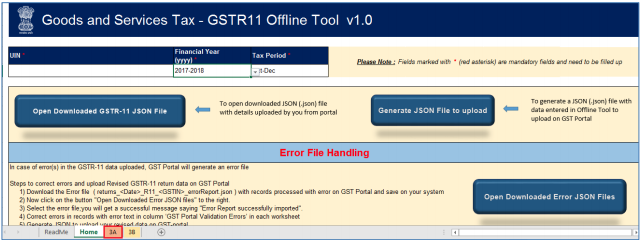
4) Click the next tab i.e. 3A.
5) Enter details in each field of the worksheets.
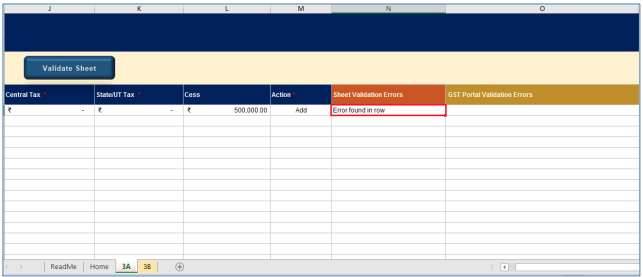
6) Once all details are entered, click the Validate Sheet button to validate the worksheet.
In case of successful validation:
7) The Sheet Validation error(s) column shows no errors.
In case of unsuccessful validation:
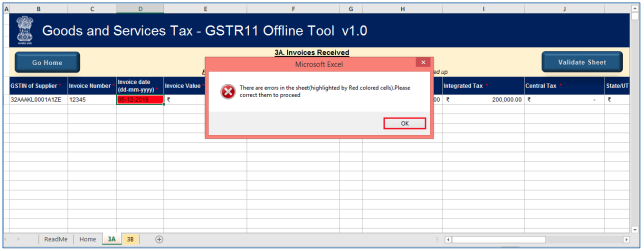
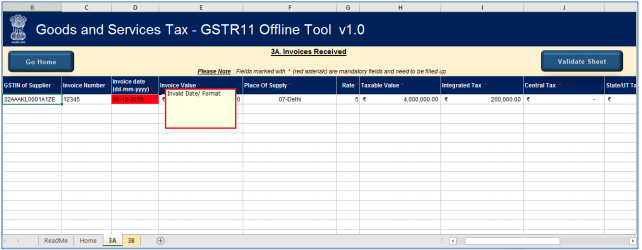
8) A pop-up message is displayed that Errors are shown with red colored cells. Click the OK button.
a. In case of validation failure, check for Sheet Validation Error(s) column that have failed validation and correct errors with red colored cells.
To view the comments for fields with errors, you can click the Review tab > Show All Comments link.
9) Once all errors are rectified, click the Validate Sheet button to validate the worksheet.

10) The Sheet validation error(s) column is blank, in case of no error on the workbook.
2. Generate JSON file using ‘Generate JSON File to upload’ button
1) Upon successful validation, navigate to worksheet Home.
You can also click the Go Home button to navigate to worksheet ‘Home’.
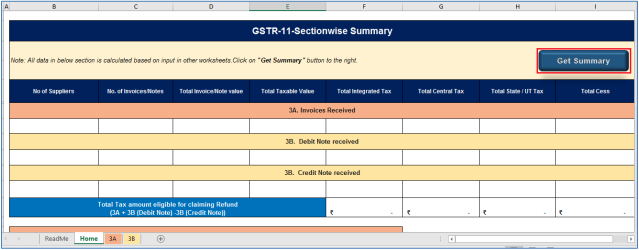
2) Click the Get Summary button to update the summary on Home tab.
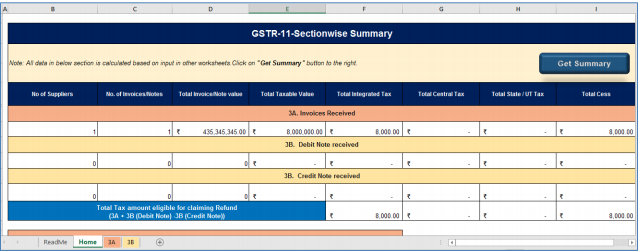
3) Summary is displayed for all the sections
NOTE: Summary is generated based on the data entered in various worksheets. POS wise summary is also displayed at the bottom.
4) Click the Generate JSON File to Upload button to generate JSON for upload on GST Portal.
5) A message is displayed that processing may take some time. Click the OK button.
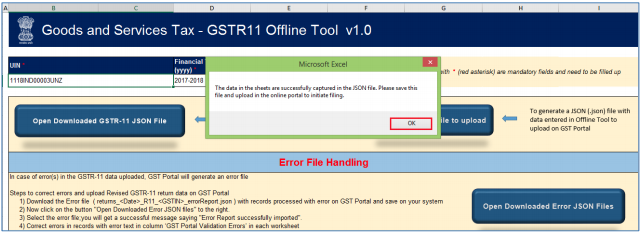
6) A confirmation message is displayed that export of JSON file has completed. Click the OK button.
JSON would be generated only if the worksheet has been successfully validated.
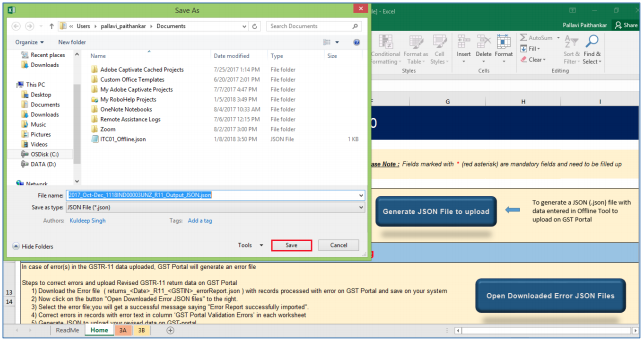
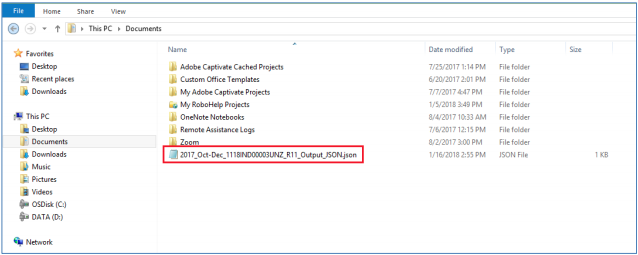
7) Navigate to the folder where you want to save the JSON file. Enter the file name and click the SAVE button
8) Notice the JSON file created.
3. Upload the generated JSON on GST Portal
1) Access the https://gst.gov.in/ URL. The GST Home page is displayed.
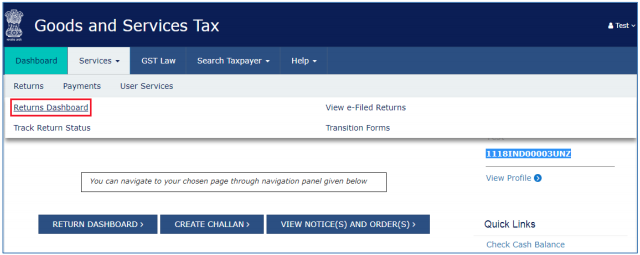
2) Click the Services > Returns > Returns Dashboard command after log in.
3) The Returns Dashboard page is displayed.
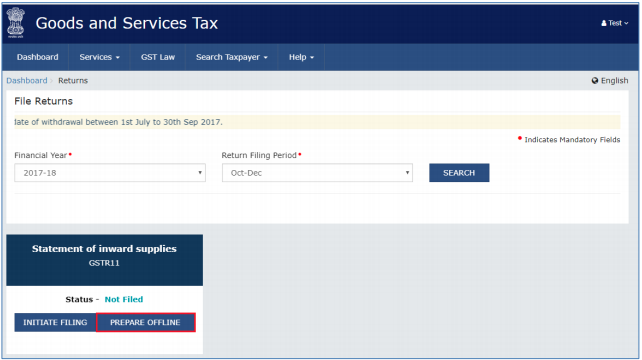
4) Select the Financial Year and Return Filing Period from the drop down list.
5) Click the SEARCH button.
6) Click ‘PREPARE OFFLINE’.
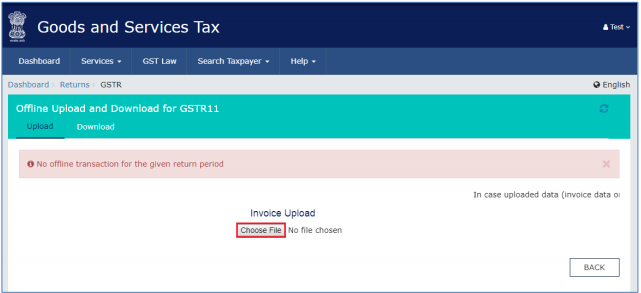
7) The Offline Upload and Download for GSTR-11 page is displayed. Click the Choose File button.
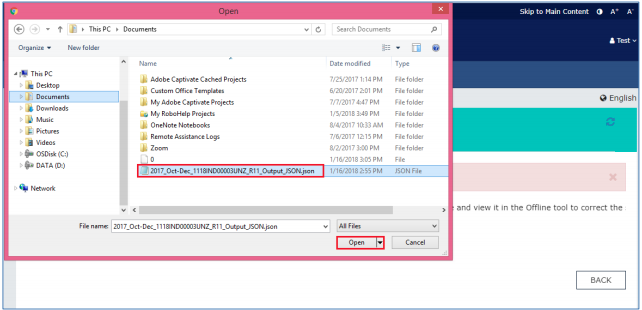
8) Browse and navigate the JSON file to be uploaded from your computer. Click the Open button.
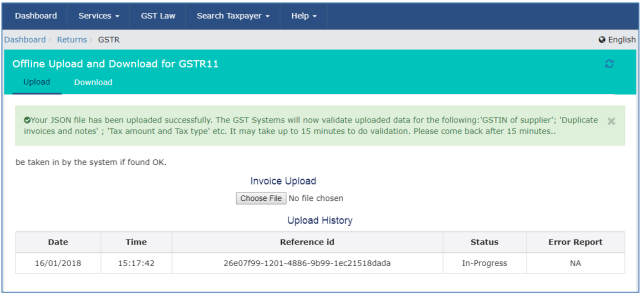
The uploaded JSON file would be validated and processed. Upon successful validation and processing the details entered would be populated as a summary.
In case of validation failure upon processing; errors, if any, would be shown on the GST Portal.
Please note it is possible to upload JSON multiple times on GST portal till submission. However, if some invoice exists from previous upload irrespective of their items, it will be updated with latest uploaded details. All new invoice will be added as new entry.
Post successful upload of data on GST Portal, you can preview the form and file GSTR-11 return.
4. Open Downloaded File for GSTR11
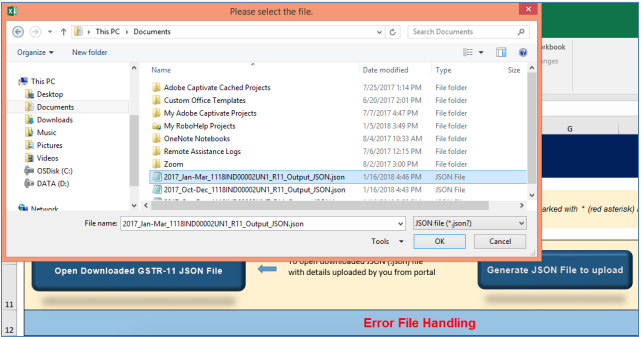
1) To Open the Downloaded file for GSTR11, click “Open Downloaded GSTR-11 JSON File” on Home tab.
2)Browse the JSON(.json) file and click the OK button.
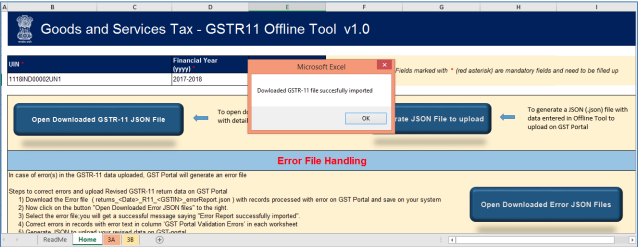
3) Select the downloaded JSON (.json) file and click on OK to proceed. Once successfully imported, you will get the message “Downloaded GSTR-11 file successfully imported”
4) Now the sections for which you entered details of invoices/taxes to upload in GST portal will be populated with data automatically.
5) Modify the invoice details as per requirement.
6) After making the modifications, click the Validate Sheet button to validate the sheets.
7) After each section is successfully validated, click the Get Summary button to update the summary on Home tab.
8) Summary is displayed for all the sections.
9) Click on ‘Generate JSON File to upload’ to generate JSON(.json) file for upload of GSTR11 return details prepared offline on GST portal.
10) Follow steps mentioned in Upload the generated JSON on GST Portal section.
5. Open Downloaded Error File
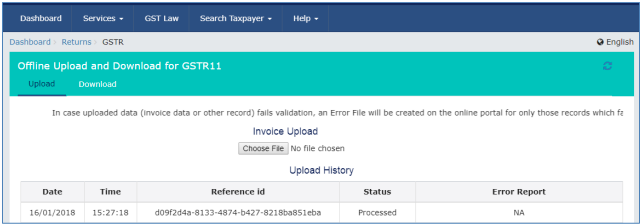
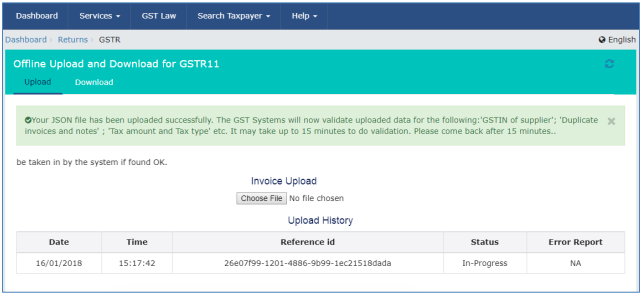
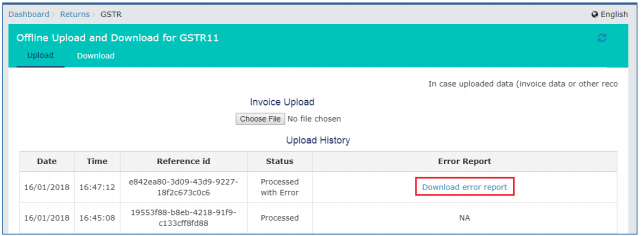
In case data uploaded through JSON on the portal fails validation as defined in the portal, an Error File will be created on the online portal for only those records which failed. The error file will be available in a hyperlink as given in the below screen on the upload off line page in the portal. Initially the Status in the Upload History will be shown as ‘In-Progress’.
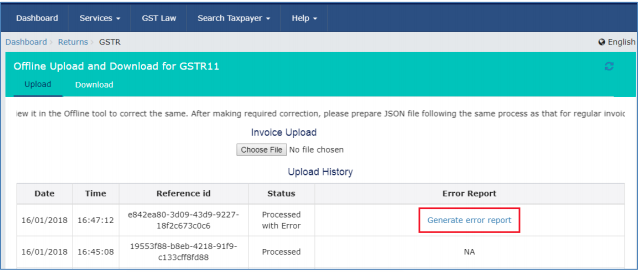
After some time, the Status will be changed to Processed or Processed with Error.
1) In case of the error, the Error Report column will display a link to Generate error report.
2) Click the Generate error report link to download the report.
3) Once the report is generated, click the Download error report link to download the error report.
NOTE: Report generation may take some time to get generated.
4) Error report is downloaded in .zip file. Save error report on your system.
5) Unzip the files from .zip folder. To unzip the files, right click on the downloaded .zip folder and select “Extract All”.
6) Browse the location to save the extracted error reports and click the Extract button.
7) The Unzipped folder contains a JSON file.
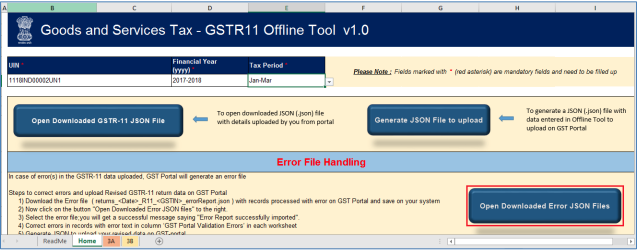
8) Now open GSTR11 Offline Tool and go tab Home.
Under the section Error File Handling, click the Open Downloaded Error JSON File button.
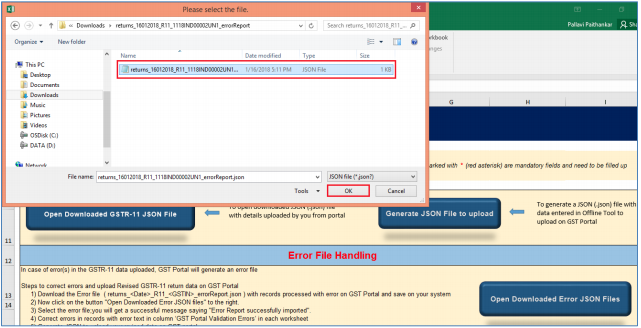
9) A file dialog box will open. Navigate to extracted error file. Select the file and click the OK button.
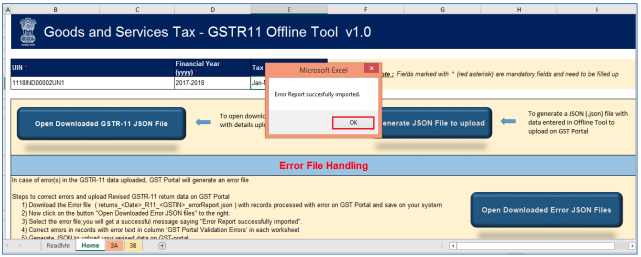
10) Success message will be displayed. Click the OK button to proceed.
11) Navigate to Worksheets 3A/3B and ensure all records from both the files have been successfully opened in Tool.
12) Correct the errors as mentioned in the column “GST Portal Validation Errors” in each sheet.
13) After making the corrections, click the Validate Sheet button to validate the sheets.
14) Upon successful Validation, Generate JSON file. Refer Topic Generate JSON file using ‘Generate File to Upload’.
6. Submission and Filing of GSTR11
1) Access the https://gst.gov.in/ URL. The GST Home page is displayed.
2) Click the Services > Returns > Returns Dashboard command.
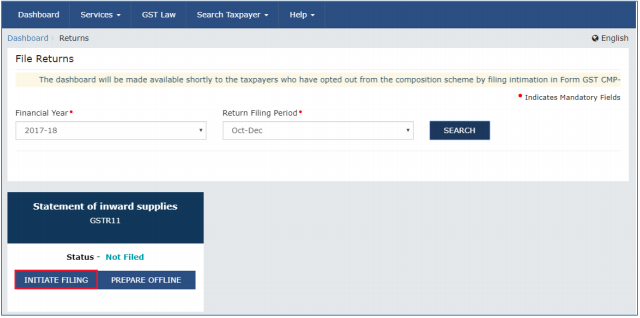
3) The File Returns page is displayed. In the Financial Year drop-down list, select the financial year for which the return has to be uploaded.
4) In the Return Filing Period drop-down list, select the return filing period for which the return has to be uploaded.
5) Click the SEARCH button.
6) Click the INITIATE FILING button.
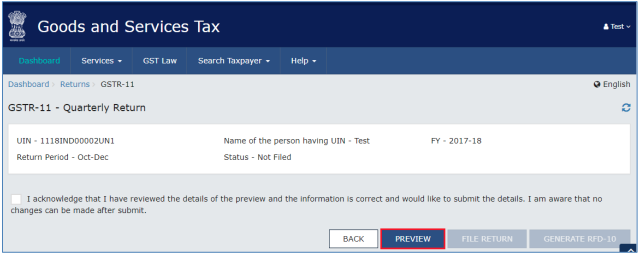
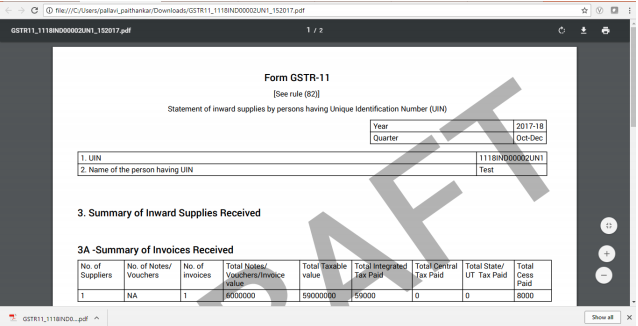
7) Click the PREVIEW button to view the summary in PDF File. Please ensure that you validate the PDF summary with summary in offline tool and your accounting records before submitting GSTR11.
Sample PDF is as below:
Online ‘Preview’ for validation of summary details is critical to ensure all details required to be declared for selected Return period have been successfully processed on GST portal. Check the ‘Preview’ and submit only once assured for completeness of summary available in ‘Preview’. In case of any deviation from expected summary details; please upload a new JSON on GST Portal. You can also download the preview to verify at your convenience
You can match these values with the summary generated in the GSTR11 Offline Tool and your accounting records to ensure correct upload of invoice data.
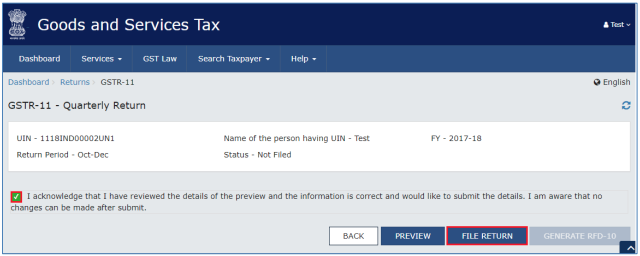
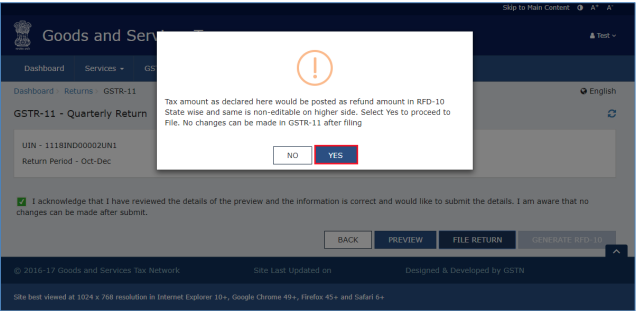
8) Select the declaration Checkbox and click the FILE RETURN button.
9) Select YES to proceed.
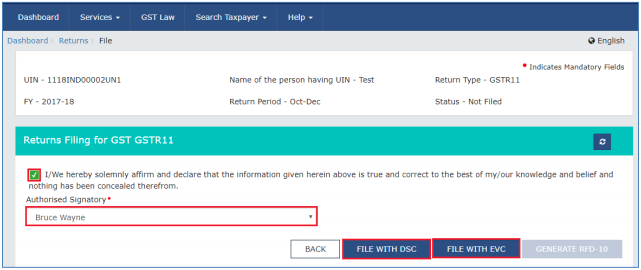
10) Select the Checkbox.
11) Select the Authorized signatory from the drop-down list and click the FILE RETURN (With EVC or DSC) button.
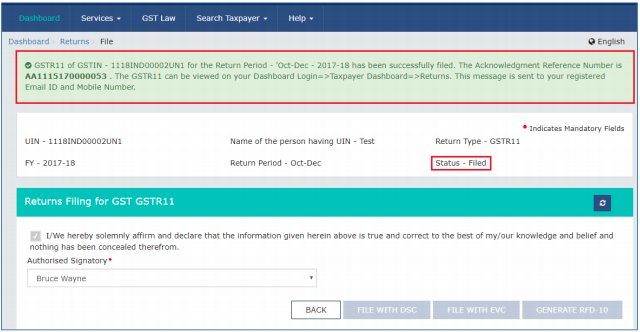
12) Once the Verification is completed, ARN will be generated and status is changed to Filed.
